Saturday, May 29, 2010

Strawberry Shortcake - From Muffin Mix!

We love strawberries and were excited to get some delicious strawberries at a produce stand while in North Carolina last week. In the typical year, we don't have strawberries until June. Imagine our surprise to come home to find our strawberries were ready for picking!

Our strawberries are doing wonderfully this year. The robins were enjoying the fruit as much as we were but we pulled out our bird netting which put a stop to the bird buffet. We picked 22 quart this week and it looks like they are only beginning!
I grew up with eating lots of strawberry shortcake. My mom made a biscuit type shortcake and with whole wheat flour, berries and milk - it made a simple delicious breakfast, lunch, supper or dessert!

One morning this week, I was wishing for shortcake when I thought of the master muffin mix. The ingredients are very similar to my mom's shortcake. It only took minutes to mix up a batch using the muffin mix, pour into a pan, and bake for about 20 minutes. While waiting for it to bake, Ed and I picked the berries. I've made two more pans since then. It couldn't get easier or more delicious!

Vactation Meals - The Results

After encouragement from you all, I made a menu for our vacation meals and began meal prep. To be honest, by the time we were ready to leave, I was wondering if it was worth it. The week before we left seemed VERY busy! I know it was my own fault. My perfectionist tendencies kicked in on full gear. Not only did I want to make all our vacation food, but I wanted it to be all our favorite foods, and all made from scratch! I also wanted to leave the house perfectly clean and catch up with the garden work. It was a recipe for one tired crabby Mama who needed a vacation!

I would definitely prepare meals for vacation again but I would aim for a more balanced approach. We could have eaten boxed cereal, or survived with hot dogs and baked beans one night. Or possibly if I would have gotten some help for a day so that I wasn't trying to do extra cooking and care for children. Anyway, we all survived, and maybe the extra work made the results sweeter.

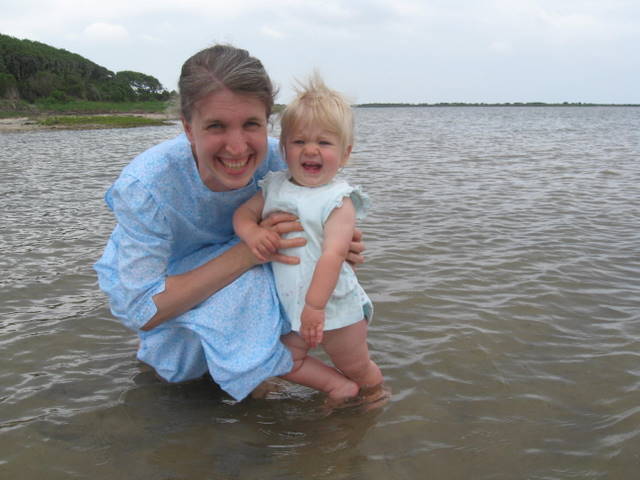
Because we really did enjoy our vacation meals! We took a tremendous amount of food. I wish I would have thought to take a picture. We had a huge ice chest with the cold/frozen items and two boxes with dry and baked goods. Somehow we managed to eat nearly all the food in the week. With lots of exercise and fresh air, we needed three hearty meals and some snacks every day.

The only cooking I did all week, besides putting something in the oven, was scrambling eggs, cooking pasta and rice, grilling, frying french toast and some fresh fish. It was very enjoyable to have a week off from any major cooking or baking. Most days we headed out early (our children were so excited that they woke up early EVERY morning. Only two mornings did they sleep in until 7:00!) and were back to our house for lunch and naps in the heat of the day. For our children, this schedule worked well but a couple days, we did take a little lunch with us. Nearly all our meals were eaten on the wonderful balcony with the fresh ocean breezes stirring the appetite! The only food purchases we made were for ice cream, fresh fish, fresh strawberries, and a cake mix which my husband baked for my birthday!
Here is a run down of our week's menu.

Breakfast:
Hard boiled eggs, sliced apples, granola bars (on the road meal)
Biscuits and sausage gravy
Breakfast burritos
Bagels and cream cheese, scrambled eggs
Waffles with peanut butter
French toast
Scrambled eggs with leftover steak
Clean-out-the-fridge morning with a yummy fried rice/egg conglomeration
Lunch:
Turkey wraps, carrots, cookies (on the road meal)
Hamburgers, rolls, cheese ball
Chicken-broccoli-alfredo calzones
Hard boiled eggs, carrots, pretzels, cookies (on the road)
Leftovers
Meatballs and spaghetti, fresh strawberries
Chicken salad wraps
Balona, cheese, crackers (on the road)

Supper: (that is what we call it!)
Poppy seed chicken and salad
Stromboli and salad
Japanese chicken and rice
Grilled steak, cheesy potatoes, green beans
Enchiladas and salad
Fish fry and baked corn
Leftovers from the week
Maybe this will give you some ideas for your vacation meals - just don't do as I did and try to do it all!

Friday, May 28, 2010

Vacation Destination

When I asked if any of you knew where we went, I thought maybe someone would have a good chance at guessing from the lighthouse photos. On purpose, I didn't show the top of the Hattaras Lighthouse (shown above) thinking it would be a dead giveaway for those who are familiar with the area. But some of you guessed it right even without the added help!

We went to Outer Banks, North Carolina. I now know why this is such a popular vacation spot! We stayed at a rental house near Rodanthe, south of Nags Head on Hattaras Island. We thought this was the perfect spot as the village is small with very few people in the middle of May. We were within driving distance of the Wright Brother's Memorial and Jockey Ridge (huge sand dunes) in the north and Cape Hattaras Lighthouse in the south with miles of the Cape Hattaras National Seashore in between. One day we took the ferry over to Ocracoke Island which was the highlight for our children. On the way home, we visited Ed's sister and her family in northern North Carolina and had a great weekend renewing family ties.

Someone asked what camera we use. Actually, we bought a new camera on this trip. It wasn't an expected purchase. Less then 24 hours after our arrival, our camera (a little Canon Powershot A560) fell into the ocean. We were able to rescue the camera card but the salt water doomed the camera. We couldn't imagine vacation without a camera so on our only rainy day, we drove up to Kitty Hawk to Walmart and purchased a new one. Our selection was very limited but my husband picked out a Nikon Coolpix L110. It is a definite upgrade from our last camera and I'm having fun playing with the added features especially for food photography!

And, finally, could you pray for our three year old? He fell out of bed on our last night of vacation and has had a great deal of pain in his shoulder. First we thought his collar bone was broken but now we think he may have torn something in his shoulder.

Next up...the result of vacation food planning.

Wednesday, May 26, 2010

Enjoying God's World - May Beach Edition

Visiting a new area last week gave us ample opportunity for nature study. None of our children remembered being at the beach, so it was an exciting time of discovery. Here is a few of the things we enjoyed doing and learning.
Watching the surf.
Playing in the shallow waters of the sound.
Discovering the difference in taste, smell and feel of salt water.
Noticing low and high tide.
Looking for the ways plants adapt to ocean side life.
Finding wildlife that lives by the sea
including crabs,
turtles,
toads,
and lots of birds.
Discovering how beach life and storms affect people
by visiting a life saving station,
lighthouse,
riding a ferry,
and visiting another lighthouse.
Climbing huge sand dunes,
flying kites,
and digging in the sand.
So much fun mixed with lots of learning - an unforgettable experience!

Anyone want to guess where we went?

Sunday, May 23, 2010

We are Back!

We had a wonderful vacation but it is good to be home. When we pulled in the driveway, it was getting dark but we all jumped out to run around and look at the garden and visit the chickens! I could not believe how much everything grew in only one week- including the weeds!

I hope to respond to some of your comments and share some photos from our trip, but first I have some unpacking to do!

Saturday, May 15, 2010

Planting Tomatoes

If I could only grow one vegetable, it would be a difficult choice between tomatoes and lettuce. Lettuce is easy to grow, takes little space and is so prolific. But tomatoes are not difficult to grow either and the taste difference between a homegrown vine-ripened tomato and a grocery store tomato is astounding.

Thankfully, I don't have to choose only one vegetable. If you have even a tiny amount of soil, try growing a tomato plant. Even a sunny pot on a deck will be sufficient to add the taste of sunshine to your plate this summer.

While I have had numerous garden failures, tomatoes are something that grows VERY well for me. In past years, our tomato plants have grown to nearly six feet tall. Often they grow out the tops of their large cages and down the other side until I go after them with the hedge clippers just to keep them a manageable size.

I'm not sure what to give the credit of our tomato success. (And since I've bragged them up, this year our tomatoes are sure to be a dismal failure.) But I thought I'd share how I plant my tomatoes.

Tomatoes like warm soil. We can not wait for that first red tomato but don't be in a hurry. Planting tomatoes in cold soil will only shock the plants. Wait until the days and nights are consistently warm.
It is tempting to choose nice tall plants at the garden center. My plants this year (courtesy of my mother-in-law who graciously starts tomatoes for me every year) were at least a foot tall when I planted them.
The goal is to build a strong root system. I dig a shallow trench, remove all the lower leaves, and plant the tomato plants sideways in the ground. My goal is to only have three or four sets of leaves out of the ground. Roots will develop all along the stem allowing the tomato to survive dry conditions better.
I give each plant a shovel full of compost and water well.

This spring, I planted my tomatoes too early. The day I planted the tomatoes was sunny and windy and there was a chance of frost that evening - less then ideal conditions. An overcast, warm day with a warm nights in the future would have been far better. I was willing to risk it since I wanted to get the plants in. Rain was in the forecast and we were leaving for vacation. The plants had been hardened off (spending a few days outside in the shelter of the house) but still needed some protection from the wind and frost.
Old milk jugs with their bottoms removed made perfect hot caps. After a few days the weather warmed and I removed the jugs. The plants already showed signs of growth and were lush and green. Hopefully they are off to a good start.

Do you have any tomato growing tips to share?

Friday, May 14, 2010

Cheesy Enchiladas

I split this recipe into two 9x13 pans, making one meal to eat now and one to freeze.

Cheese Sauce:
1/4 cup butter
1/4 cup flour
3 cup milk
1 cup shredded cheese
1 cup sour cream or plain yogurt

Meat Mixture:
2 lb ground beef
1 pint kidney beans
1 onion, chopped
1-2 T. taco seasoning (depending on your family's preference of heat)
1 tsp salt

2 cup shredded cheese
12 (or more) tortillas

For cheese sauce: Melt butter, stir in flour and whisk in milk. Cook until thick. Add cheese and sour cream.
For meat mixture: Brown beef and onion. Stir in seasonings and beans.
Spoon meat mixture into tortillas. (I found about 1/2 cup is good.) Sprinkle some cheese.
Roll up and placed in greased casserole. Pour cheese sauce on top.
Bake at 350 degrees for 20-30 minutes until bubbly. Serve with salsa, lettuce and tomatoes.

Find more great freezer recipes at Life as Mom.

Thursday, May 13, 2010

Poppy Seed Chicken

A favorite recipe from a friend - and another good meal to freeze ahead.

1 cup cooked rice
3 cup cooked chopped chicken
1 cup sour cream or plain yogurt
1 can cream of chicken soup
1 T. poppy seed
1 tsp dill weed
1/4 tsp pepper
1 tsp salt
1/4 cup chicken broth

Mix all together. Top with buttered cracker crumbs or bread crumbs.
Bake at 350 degrees for 30-40 minutes.

Wednesday, May 12, 2010

Breakfast Burritos

These breakfast burritos are one of my favorite breakfast meals. The recipe makes a big batch and freeze well. The children like to help with the cheese-sprinkling and tortilla-folding.

1 lb sausage
1 onion, chopped
1/4 green pepper, chopped (I left this out this time.)
1 lb (3 cup) hashed brown potatoes
1 dozen eggs, beaten
1 can cream of mushroom soup
20 10-inch tortillas
1/2 lb cheddar cheese, shredded

Fry sausage with onion and pepper. Add potatoes and lightly fry.
Add eggs and fry until cooked.
Mix in soup.
Spoon in tortilla.
Sprinkle in cheese.
Fold tortilla. Wrap and freeze.
Heat covered in microwave or oven. Serve with sour cream and salsa.

Tuesday, May 11, 2010

Vacation Meal Planning - Thanks

Thanks so much for all your suggestions and recipe ideas for our vacation! If you haven't already, read all the helpful comments when I asked for ideas for vacation meals.

Using your ideas as a spring board, I wrote down a list of our favorite easy-prep or make-ahead meals. I soon had more meal ideas then I had meals to prepare!

Last week, I started making meals or parts of meals and freezing them. For example, on Saturday, as I was making pizza, I made a triple batch of dough and made stromboli and calzones to freeze. It has been extra work but hopefully it will all pay off!

This week, I hope to share some of my favorite make-ahead recipes. Hopefully it will inspire you, as your ideas did for me.

And, when this little corner of the web goes silent, know that I'm out enjoying the sun and the water with my favorite people in the world.

I will have no computer access for a week - and I'm looking forward to it! Technology has such a way of yelling for our attention and I anticipate reading books and enjoying a little silence. (Can't believe I just described traveling with four youngsters as "silence".)

Thanks again for helping me get excited about vacation meal planning!

Monday, May 10, 2010

Whole Wheat Oatmeal Chocolate Chip Cookie

In the search for the perfect chocolate chip cookie, I've tried many recipes. I've been looking for one with whole wheat flour. Since we eat so many cookies, I'd at least like them to be sort of healthy.

This recipe is adapted from a friend's recipe and is our current favorite. I think the secret is blending the oatmeal in the blender until almost as fine as flour. It doesn't have that dry sandy texture that whole wheat cookies sometimes have. It also makes a huge batch which is good because these don't last real long at our house unless I hide them.

1 1/2 cups butter, softened
1 1/2 cups sugar
1 1/2 cups brown sugar

Cream butter and sugar together.

4 eggs

Add eggs and beat well.

3 cups whole wheat flour
5 cups oatmeal (blended until fine)
1 tsp salt
2 tsp baking powder
2 tsp baking soda

Blend in dry ingredients.

2 cups chocolate chips
2 cups chopped nuts (optional)

Stir in chips and nuts. Bake at 350 degrees for about 10 minutes.

Saturday, May 8, 2010

Removing Blossoms from Strawberries

If you planted a new strawberry patch this year, your plants should be beginning to bloom.

I have found strawberry plants quite easy to grow, but now comes the hard part. This first year, all strawberry blossoms must be removed.

Pinching off a few blooms isn't difficult, at least it isn't strenuous work. The problem is knowing that each one of those blossoms is the promise of a luscious fruit that I am now destroying.

Removing the blossoms allows the plant's strength to build a strong root system and send out runners. We practice the wisdom of delayed gratification and anticipate next year's fruit.

This may work for other plants as well. On my deck is a pot of pansies, which daily has it's blooms removed by my toddler. She seems to find the flowers irresistible. But I've noticed that those pansy plants are the most beautiful healthy looking plants I've ever had. I just placed the pot on the picnic table so that we can maybe enjoy some pansies this spring. At least until the toddler learns to climb!

Often when I plant annuals, I remove their flowers. I also usually remove the first blossoms from my tomatoes. It goes against the grain to remove flowers and buds, but I think it results in stronger healthier plants.

Give it a try this year. Remove the flowers from half of your salvia, marigolds, or other flower when you plant them and see if you notice a difference.

Friday, May 7, 2010

Frugal Gardening Tip # 4 - Plant Perennials

When shopping at the garden center for your flowers, there seems to be a huge difference in pricing. Pansies or petunias sell for maybe $2.00 for a pack of four plants. A daylily or hosta has a price of maybe $6.00 each.

The best flower buy appears obvious, the difference of 50 cents each or $6.00. But sometimes the cheapest choice is not the most frugal.

First, let's define "annual" and "perennial".

An annual plant is one that grows from seed, flowers, produces seed, and dies - all in one growing season.

A perennial plant grows from seed, possibly does not bloom the first year, but (as long as it is grown in it's preferred climate) will live through the winter to bloom in subsequent years.

The purchase of a perennial plant, as long as it does not die for various reasons, is a one time purchase. Some perennials are short lived and have a normal life span of 3-5 years but many perennials, with proper care, may outlive the one who planted them.
Frugal options for acquiring perennials

  • Beg from friends. If you have a friend with a perennial flower bed, they probably have plants to share. I love when a friend compliments a flower and asks to have a piece. The other week, I got together with two friends and shared the extras from our gardens. Many of the plants in my bed hold memories of the friend who shared them with me.
  • Price check. Even when purchasing plants from a garden center, prices vary widely. I noticed that one greenhouse in our area asks double the price for similar sized perennials. It pays to check out a few greenhouses before buying. (For those in the local area, I don't think I'm prejudiced to mention that the greenhouse where I worked before marriage has the best prices and selection of any place I've found.)
  • Divide. The garden designers always say to plant in groupings of three or more. But I never buy more then one of a particular plant. It may take some patience but in a year or so, you'll be able to divide your first perennial into several plants. The only exception would be woody shrubby type perennials like lavender or caryopteris that is impossible to divide.
  • Buy small. Garden centers often have various sizes of perennials. Purchasing smaller pots will not only be cheaper but smaller plants sometimes adjust better to transplanting. An exception would be if you can buy a larger pot and divide it right away into several plants.
  • Start from seed. I would rarely suggest starting perennials from seed. Most of the best perennials, especially some of the newer long blooming perennials, are propagated by cuttings and not seed. For example, years ago, I wanted some shasta daisies. I bought a pack of seeds and successfully started about a dozen shasta daisies. They grew tall and beautiful, until they bloomed. The flowers lasted all of about a week and the stalks fell over into the dirt. I dug out all those plants and threw them into the compost pile. Then I tried a new shasta daisy called "Becky". This one cost about $5.00 for a large pot. "Becky" has a strong stem, it never needs staking, and it blooms most of the summer. That one $5.00 plant was divided and transplanted to several spots in my mom's yard. When I married, it came with me to this house where it formed several huge clumps. I have divided it many times and given plants to many friends and it is still growing lush. After stating the reasons NOT to grow perennials from seed, I would recommend it in some cases. Columbine, delphinium, and lupine all start well from seed. Since these three are also shorter lived perennials, it makes sense to start these from seed.
There are a few perennial vegetables such as strawberries, asparagus, rhubarb. But I'm focusing on perennial flowers. This article is getting too long. I'll write later on how to divide perennials and share some of my favorite easy care, long blooming perennials.

LinkWithin

Related Posts with Thumbnails