Showing posts with label Garden. Show all posts

Saturday, August 14, 2021

My No-Till Mulch Gardening

I grew up with a traditional garden - plowing in the fall, tilling in the spring, and tilling/hoeing between the rows during the summer. In Pennsylvania, bare soil means weeds. I spent countless childhood hours fighting weeds in the garden. The work didn't hurt me, but the battle with weeds wasn't enjoyable and the weeds always won. 

When I married, Ed introduced me to mulching. We collected grass clippings from our yard and used them to mulch the garden. Sometimes we also layered cardboard and newspaper. I was amazed at the difference. Covered soil results in far fewer weeds. But it was always a fight every spring to get enough grass clippings to cover the freshly-tilled soil before the weeds grew. We usually loss. 

Over the years I have read about mulch gardening - a method of keeping your garden covered in mulch and not tilling the ground so weed seeds are not exposed. There was an older woman (I can't remember her name) who wrote about mulch gardening in Organic Gardening magazine decades ago, and I found a compilation of her articles. Lasagna Gardening was a popular book that came out twenty years ago. And Back to Eden has made the method popular in recent years. 

I've experimented with various mulching methods through the years, but got more serious the last two years. I'm hardly strong enough to handle our tiller and though my brothers are willing to help, it would be nice to be able to garden without always asking for help.

We have a large yard with many big trees so I started by layering grass clippings and leaves on sections of the garden. In the spring, the mulch had settled and began to rot, and I dug holes in the mulch and directly planted things like tomatoes, broccoli, and pumpkins. I had nearly no weeds. Success! 

But I wasn't sure how well I could plant seeds in mulch. 

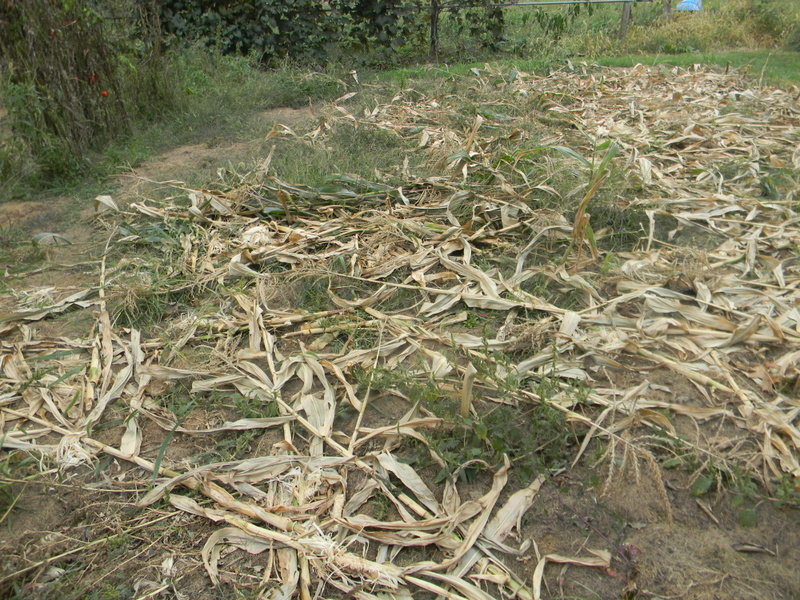
Last fall I covered the whole garden with at least a small bit of mulch. This spring I did no tilling. Using a hoe, I pulled aside the mulch and planted onion sets, beans and corn seeds, and vegetable plants directly in the mulch. I had a large amount of finished compost from my compost pile that I added to the planting rows as well.

I was able to plant the entire garden with only a hoe - no tiller needed.

The result has been a lovely garden with almost no weeding. I'm still learning what ingredients such as lime that I'll need to add to my garden to increase its fertility. As mulch decompose, it can lock up certain nutrients which is why some people allow their mulch to rot before adding it to their garden.


Garden in June

After the strawberries were finished in June, my brother tilled under some of the old strawberries, and I planted some late beans and corn. These tilled areas immediately grew a fine crop of weeds. The contrast between the mulched and tilled areas was significant.

Potatoes were another experiment this year. I often have volunteer potatoes grow in the spring from potatoes that were missed in the harvest. I decided to have purposeful volunteer potato patch. 

When we dug our potatoes in the fall, I sorted out some of the small potatoes. We tilled one end of the garden, made rows, and planted those small potatoes. We then covered this section of the garden with leaves and waited for spring.

This spring the potato plants emerged.


Potato patch in June

Not every potato grew, so we had a few skippers in the rows, but it was a lovely potato patch, with no work at all in the spring.


Last week the potato plants were nearly dead so we started digging.


I first pulled out the plants, and since we had not hilled the potato plants, the potatoes were right at the surface under the mulch. This made digging potatoes much simpler, but it also meant that quite a few of the potatoes had green skin from exposure to the sun. The mulch from the fall had rotted down too much to protect them.  We should have added another layer of mulch in the spring to protect the potatoes from the sun. The green on potatoes is poisonous, but we'll cut off the green part and eat the rest of the potato.


But despite our dry weather, the potatoes were a great size - some larger than my hand. We are getting about a half bushel per row (my rows are short), which I think is about average from past years.


When we finish digging the potatoes, I plan to sort out the small potatoes and plant next year's crop. I'll try to be more diligent in adding another mulch layer in the spring, but otherwise, this experiment worked well enough to repeat.

I love gardening, but hate weeding, and mulching allows me to maximize my favorite parts of gardening (planting and harvest) and minimize the least favorite. I look forward to learning how to make this method work better for us.

Have you tried mulch gardening?

Saturday, July 25, 2020

A Walk Through a July Garden

I think I'm enjoying my garden more this year than I have for years. 

For quite a few years I was either pregnant, had a small baby, or Ed was sick. I was glad I had a garden during Ed's illness because weeding gave me some place to work out frustration, but it wasn't well cared for. Last year I worked hard to get the garden back in shape after not being cared for properly for years. Layers of mulch have made this year's garden much more enjoyable. 

I'm trying to find ways to make the garden easier to care for. Mulch pays a huge role in this since I can't run the tiller myself. I've always used mulch in the summer but now I'm looking for ways to extend the mulching year round. 


The potato patch. We have been very dry so this photo makes the garden look both bigger and greener than real life. I watered a few times to keep the garden alive. Thankfully we have received several rains in the last three days so it is starting to green up.


The big-leafed plant is candy roaster squash - an old heirloom plant that grows huge. Strawberries are on the left.


As always, I hide the cabbage and broccoli under row cover to save it from the cabbage worm. Zucchini, peppers, and tomatoes are behind them.

Last fall I covered this section of the garden with cardboard, grass clippings, and heaps of leaves. In the spring I dug a hole in the leaves and planted the tomato, broccoli, and zucchini plants under the mulch. I have loved having a basically weed free section of the garden.


Zucchini blooms


Carrots (being chewed off by a groundhog) green beans, and sweet corn.


Green bean blossom.


Green tomatoes and blossoms.

Saturday, February 18, 2017

3 Simple Tips to a Successful Garden this Year

February might be brown and cold here in Pennsylvania, but colorful seed packets are arriving in the mail and I'm beginning to dream about gardening.

There is a danger in dreams. I've watched gardeners turn over soil and plant seeds in May with hopeful optimism. But too often those same gardeners throw up their hands in despair three months later as the August weeds put the death-choke on their plants.

Sometimes that gardener has been me.


What can I do to help insure a successful garden this year? 

This past year I watched two beginning gardens. Both were located on a road that I travel often. I don't know if this was the gardeners first garden, but in both cases, they started with a bare stretch of lawn and turned it into a lush garden. From driving past on the road, I couldn't tell how much they harvested from their garden, but both gardens were obviously cared for throughout the season.

Here are a few of my observations of these two gardens and the tips I've gleaned from my own gardening experiences.

1. Dream within Reality

Neither of these gardens were large. I might be a poor judge of distance, but I'd guess the one as a 10 by 20 foot plot. The other garden consisted of four raised beds maybe 3 by 6 feet. They did not turn their entire yard into a garden. They didn't plant a market garden. I have seen many beginning gardeners fail because of planning too large of a garden.

A wise gardener will plan realistically, which is more difficult than it seems in the spring. It is easy to forget the reality of August, when the weeds, heat, and bugs conspire against the most hardy gardener.

Last year I purposely planted a smaller garden. I knew I would have a six-month-old baby in August and I decided that it wasn't the year to break records.

I didn't regret that decision.

While the two gardens I observed last year were small, they appeared to be well-maintained, which will give courage to plant a garden next year, and maybe, with a little experience under dirty fingernails, the gardener can successfully extend its size.

Planning a smaller garden will also help make sure you are planting wisely. Why plant zucchini if you hate it? Or ten tomato plants if all you want is a few cherry tomatoes for your salad? Evaluate what you already eat and don't pretend you will suddenly acquire a love for eggplant.

2. Have a Plan, And Do It

Both gardeners that I watched last spring obviously had a plan. They didn't walk out to their yard one day, dig a hole, push some green bean seeds in the ground, and hope they would grow.

One of the gardens actually began the year before. One Saturday in late summer Ed and I drove by this yard where a man was busy at work with a shovel and wheelbarrow. It appeared as if he was removing the sod. We made guesses about what he was doing. Planting a tree? Building a shed? But after a few weeks it appeared that the project was abandoned. A neat rectangle section of sod had been removed but there were no further signs of progress.

A few weeks later Ed mentioned that it appeared that they were layering grass clippings and leaves on this section of bare earth. Throughout the fall, more leaves and more grass clippings were added and we guessed that this spot was meant for a future garden. Sure enough, in the spring, this new garden was planted. Those months of adding mulch and a winter for it to decompose would have made a wonderful rich planting bed in the spring. The summer appearance of the garden proved the gardener was rewarded for his efforts in planning a whole season before planting his garden.

The other gardener I watched last year prepared four raised beds. They were simple wooden beds, narrow enough to reach into the middle easily. Again, the work of preparing this garden was resulted in lovely growing conditions.


3. Sit and Enjoy

I've long been a proponent of "walk your garden." In other words, spend regular time in your garden, both to enjoy it and recognize problems while they are still small.

But maybe I should change that to "sit in your garden." The gardener with the raised beds placed a bench beside the garden. They also planted perennials, maybe herbs, nearby. The garden was directly beside the house and certainly added beauty to the home's landscape.

The other garden didn't have a bench beside it, but I often saw a small child's riding toy in the yard and a large deck was nearby. My impression was that these were people who spent time outdoors.

If you plant a garden, find ways to enjoy it. Take your coffee outside and listen to the robins at dawn. Or carry out a lawn chair and watch the bats come out to eat the mosquitos at sunset.

There are many ways to provide food for your family. A garden is not a necessity for most of us. So keep it manageable, plan well for your success, so you can sit and enjoy it in August.

If you find ways to enjoy your garden, you are more likely to have positive memories to make you spend your brown February days planning the success of your next garden.

What are your tips to a successful garden? Or am I the only one who is dreaming of gardening?

For more garden info, check out our garden page.

Wednesday, July 27, 2016

A July Garden

Two weeks ago I took some photos of my garden. Since then it has grown - both more weedy and more dry. The last two weeks have had many days with temperatures above ninety and with no rain, we feel rather parched. 

If you, like me, like to see others gardens, here is a glimpse of mine. Thankfully you can't quite tell how much of the green in the photos are weeds.


Our lower garden (the smallest of our two patches) has zinnia, sweet corn, and pumpkins this year. Yesterday we ate our first sweet corn. Yum. Our resident ground hog was also enjoying the corn but he made the mistake of showing up this morning, sluggish from a belly full of corn, before Ed had left for work -  and that was his last meal.


This is our larger garden. In the front is the strawberry patch which we rejuvenated by mowing, narrowing, and mulching. It is beginning to green up again. Beside the strawberries was a row of garlic that was just harvested.


Next is peppers interplanted with marigolds, zucchini squash, and eggplant. My eggplant looks terrible this year. I didn't use a row cover this year and the tiny flea beetles are chomping it down. Out of sight behind the taller plants is what should have been a row of carrots. I planted twice and still only have a few tiny plants growing. 


But the potatoes look great, so as usual, some things grow well and others do not. (And the red roots always do well.)  Beside the potatoes are the green beans. The ground hog took a nibble at these, but not nearly as badly as last year. But the beans are not doing well. Maybe because of how hot and dry it is? I'm getting a few to put away but I wish they were producing better.


The onions are nearly ready to pull. Behind them is the broccoli and cabbage hiding under row cover. We have eaten several meals a week from these broccoli plants. They look overgrown and misshapen but  they keep producing side shoots so they earn their spot in the garden. Behind the broccoli is two rows of early potatoes that we are digging.


The tomatoes are just starting to show signs of blight. I'm hoping they produce some before they succumb. It doesn't seem to matter what trick I try, blight hits our tomatoes every year. 


And here is the view from the tomato end of the garden showing both garden plots.


The red raspberries are looking great. If we would just get rain...


Last year my herb garden had totally grown up in weeds and grass so I dug it all out and started over this year. It is still a little sparse but I'm enjoying fresh dill, parsley, and basil.


Not everything that grows here is green! In the last month this girlie has started crawling and sprouted two teeth - what a change from six months ago when we were cuddling our newborn. She loves to be outside, she loves to eat, and she loves her mama so I expect I'll have another garden helper before long.

What challenges and joys have you faced in your garden this year?

Saturday, October 31, 2015

Late Fall Gardening Goals

I'm always amused at the difference between spring and fall in the garden.

Or at least in my attitude toward the garden.

In the spring I can't wait to get outside and any day that is reasonably nice weather I find some excuse to be outdoors. I count down the days until it is safe to plant the garden and long for fresh picked vegetables.

In the fall, no longer does it seem urgent to enjoy the sunshine. I don't make the most of my garden opportunity; I'm even guilty of letting some of those wonderful veggies go to waste.

I just don't care.

But I have found that if I ignore the garden in the fall,  I pay the price in the spring. It is no fun to find garden hoses and tomato cages still in the garden in March.


 Two weeks ago we had our first frost. And it wasn't a light frost. It was a hard killing frost - the kind that makes the grass crunchy and hangs ice on the clothes line.

I was glad that the week before we had cleaned up most of the garden, pulling out the tomato cages and harvesting the last peppers and eggplant. I had also planted garlic.

Last week the children helped me several afternoons and we cut down all the old perennial plants such as asparagus, red raspberries, and the perennial flower beds.


It felt like a big job, at least for my pregnant body, and I couldn't have done it without the children's help. But now I can say that my outdoor work is completely finished. I have a few cabbage heads in the garden, but now I'm spending my time indoors, enjoying nesting.

As Ed mows the grass this fall (which hasn't been growing fast with the cooler weather and lack of rain) he chops up the fallen leaves and spreads this mixture of leaves and grass on all the perennial beds.


In some of the beds, such as this very weedy asparagus patch, we put down cardboard beside (not over) the asparagus crowns.

This mulch will be a huge time saver next spring and hopefully curtail some of our weed problems.


I have a few greens (lettuce, spinach, and kale) growing in the cold frame by the basement. I wish this was stuffed full, but the dry fall and my late planting means the growth is rather sparse. Still, we'll enjoy a few fresh salads.

Here is my late fall garden goal list.

1. Plant garlic. (October)

2. Trim off perennial plants.

3. Mulch perennial beds with chopped leaves.

4. Drain garden hoses, pull out tomato cages, clean up tools, and tidy the garden shed for the winter.

5. Write down notes from this year's garden to aid in garden planning next year.

6. Mulch strawberries with straw. (December)

Is anything still growing in your garden?


Tuesday, September 29, 2015

September Garden Plans

 What happened to the last weeks? I realize that it is too late in the month to be talking about what we plan to do in September as the month is nearly over. But just for my records, I'm doing this post anyway. 

(And hoping that it doesn't take me as long to get October's garden planning post up.)


September can be a wonderful gardening month. The weather usually cools, making picking more pleasant than in August but the harvest is often abundant.


We spent Saturday making applesauce. I love the fall aroma of apples cooking on the stove. (The sad part is that we need at least 100 quart of applesauce so this won't be my last applesauce making day this fall.)


The problem with September is that I'm usually burned out. No longer are fresh veggies exciting as in the spring. I've given up the war with the weeds and bugs. Chewed leaves no longer make me angry. "Just eat the old things and see if I care."


But this month did see the end of the major garden preserving and I am slowly finding that I once again enjoy walking out in the garden for a few peppers, handful of green beans, and some red beets. Soon we will be harvesting cabbage and broccoli.


The tomato plants are mostly dead but I haven't pulled them out since we are still enjoying an occasional tomato. And the peppers are still lovely. Not sure what they are living on since I quit watering them.

The garden isn't the lovely sight it was in early summer but the areas we had mulched or planted a cover crop are nearly weed free. It does make me a little sad to think that soon a frost will bring and end to the fresh garden eating.

Here is my list of jobs for September month in my garden.

1. Take each opportunity to enjoy the garden produce – even when enthusiasm is flagging.

2. Plant lettuce, spinach, and kale in the cold frame.


3. As areas of the garden are finished for the season, add compost, lime, mulch or plant a cover crop. In our late corn patch, I just cut down the stalks and let them fall. They will rot down by spring.

4. Save seeds. I only saved tomato and zinnia seeds this year but I hope to learn more about seed saving in the future. Regina shared about saving flowerseeds in a past post. 


5. Since our weather has been very dry, keep watering the fall cabbage and broccoli. Also water the new strawberry patch. In the photo above you can see the strawberries with the soaker hose.This is the greenest part of our garden (and also the weediest.)

Is your garden over? Or are you enjoying a fall garden?

Tuesday, September 22, 2015

How to Make Oil-Packed Sun-Dried Tomatoes


I have dried tomatoes for several years, but I have had trouble rehydrating them easily for use.

Last year I tried placing them in oil - and found a winner. They were ready for instant use on pizza or salad. This year, I made sure that I had two jars of these tomatoes stored for winter. An added benefit is that one quart jar will hold a pan full of tomatoes - a great space saver in the pantry.

Here was the steps I followed.

1. Dehydrate tomatoes. I followed these directions for drying tomatoes. I like to dry them until they are leathery. When making tomato powder, I like to dehydrate a little longer until they are crispy. But for oil-packed tomatoes, I like them to still be bendable but with no moisture remaining.


2. Next I set up a dipping station. For safety, I dip the dried tomatoes in apple-cider vinegar. I use tongs to dip the tomato slices in vinegar, allow to drip for a few seconds, then layer them in a quart jar.

I continue dipping and layering until I have used all the tomatoes.

3. I then fill the jar with olive oil - making sure the tomatoes are completely covered with oil. This seems like a lot of oil but it won't be wasted. After using the tomatoes, I love to make salad dressing with this tomato-infused oil.

As the the tomatoes soak up the oil, they may sink down further in the jar. If you are making more batches of dehydrated tomatoes, you can add more vinegar-dipped tomatoes to the jar, adding more oil if needed.

4. Store the jar of oil-packed tomatoes in a dark place.The color of the tomatoes will change but they will stay tasty for over a year.

5. To use, fish out a tomato with a clean fork. Chop and add to a salad or pizza. Enjoy the intense flavor of summer.

Monday, September 21, 2015

How to Save Tomato Seeds


I remember an old friend of our family who, every time he ate an especially yummy tomato, would squeeze out a few seeds into a bowl to save for next year. In the spring, he had a bowl of "who-knows-what-kind" of tomato seeds to plant.

I enjoy trying new things and this year, just for fun, I decided to save some of my own tomato seeds to plant next year. But I chose to be a little more deliberate about my seed saving than our friend.

First I chose a lovely Amish Paste tomato from the garden. 

Amish Paste is an open-pollinated (sometimes called an heirloom) tomato. This means that it is not a hybrid. A hybrid is created by crossing to different parent plants to make seed for a new hybrid variety. Seeds saved from a hybrid tomato will not produce tomatoes like the tomato they were taken from so choose an open-pollinated tomato.

Tomato flowers will generally fertilize themselves so even if you grow several kinds of tomatoes, you should have pure seed. It is possible, especially for larger flowering varieties, to cross pollinate and make their own hybrid, but from what I've read, it is not likely.


Choose a tomato that has the characteristics that you want. I chose a tomato from a plant that had been slow to catch blight, in hopes that it has some genetic resistance to blight. You might choose your earliest, tastiest, largest, healthiest, or other characteristic that you wish to select for next year.

You will still get to eat the tomato, so it is not a sacrifice to choose the best.


Cut open the tomato and squeeze some seeds into a jar. If you have several varieties of tomatoes, be sure to label each jar.

At this point I chose to ferment the tomato seeds. This is not absolutely necessary but it helps the tomato seeds to separate from the gel and can help get rid of the bad seeds.

Make sure the seeds are covered with liquid. If the tomato did not have enough juice, just add a little water to the jar.

Set the jar in a dark place for 3 to 5 days.


The seeds will probably grow a layer of mold on top. That is normal. Just remove the mold and add some more water and stir. Wait a few minutes. The good seeds should sink. Carefully pour off the water and the bad seeds and bits of pulp.


I used a sieve to help pour off the remaining water.


I rinsed the seeds until none of the pulp remained.


Then place the seeds on a paper plate or piece of newspaper. Don't use a paper towel because the seeds will stick and be nearly impossible to remove. But don't use a plastic or glass plate as you want the water to be absorbed. 

Let the seeds completely dry for a day or two. Then place the seeds in an airtight container or bag. Tomato seeds will last for years at room temperature and will last even longer if kept in the refrigerator or freezer - as long as they are kept completely dry.

Next spring, I'll let you know how these seeds grow.

Have you ever saved tomato seeds?

Friday, September 11, 2015

Steaming Grapes


We have struggled for many years to grow grapes. 

Every year, something takes our fruit. We've had late frosts that withered the blossoms, worms that ate the new fruit, and many years of battle with black spot. I'm not sure if our issues are from inexperienced grape tenders or random circumstances.


This year we had an additional problem of Japanese beetles which loved the grape leaves and stripped part of the vine.


The grapes to the right have "black spot." Black spot is a fungal disease. It starts with a small diamond-shaped black spot on the stems, spreads to a black spot on the grapes, and turns the grapes into dried, inedible lumps that my children call "raisins" but are actually called "mummies." Apparently, if you have black spot in your plants and soil, it is hard to get rid of. I don't do well at remembering to spray and after many crop failures, we were thinking of just chopping down our vines.


But this year, our three vines were loaded with fruit. We lost a some of the grapes to black spot but other branches were loaded with beautiful clusters.


We harvested two bushels, one each of purple and green grapes. I was thrilled to be able to can grape juice again.


The children helped to strip the grapes from the stems. Then I borrowed my mom's Methu-Liisa steamer. Last year, when I only harvested a small pan of grapes, I canned them whole like Hope describes. But I prefer steaming since it results in a convenient grape juice concentrate.


The steamer consists of several stacked sections. To use the steamer, first fill the bottom section with water. As it boils, I had to keep checking to make sure the water had not all steamed out of this pan, otherwise, it could ruin the pan.


Stacked on top of the bottom section is the pan that collects the juice. It includes a tube to pour off the juice.


The next section holds the grapes and has a strainer-type bottom for the juice to drip through. I just rinsed the grapes before placing them in the pot.


Steaming grapes is easy. Except for watching that the water did not boil away and occasionally pouring off the juice into the jars, it is not difficult. But it is time consuming. It took me all day to steam those two bushel of grapes.


When the grapes had cooked down into a mash, I knew that most of the juice had been extracted. I dumped it out and started the next batch.


The result was a counter full of grape juice. The purple juice is from the purple grapes; the pink juice is from the green grapes. I added my sweetener before closing the lids. I use 1/2 cup sugar or 1/2 tsp of stevia for every quart. I canned the grape juice in a water bath canner to seal the lids. 

When we did a taste test, I think I should have added more sweetener. The juice seems far more concentrated this year then sometimes. I added one quart jar to three quarts of water to make a gallon of juice - and the juice was still plenty strong. I wonder if the dry weather concentrated the flavor? I added a little more sweetener when I served it and we all loved it. Since our family is almost exclusive water drinkers, juice is a rare treat. The children thought that our own grape juice was worthy of getting out the goblets and experiencing some fine dining!


LinkWithin

Related Posts with Thumbnails