
I have a love/hate relationship with menu planning. I don't really enjoy menu planning but when I discipline myself to menu plan I'm amazed at the amount of time and stress I save! It is also one of those areas that get easier with practice. Menu planning takes me much less time now then it once did.
I like to menu plan by giving each day a "theme". I've tried meat themes (chicken, fish, beef) but what has worked best for me is designing my themes around types of dishes (soup, casserole, crock pot, Mexican).
Our menus also seem to fluctuate with the changing seasons. In the winter I crave comfort food - soups, stews, and casseroles. In the summer, I crave vegetables - fresh, home grown vegetables of every sort.
I'm always trying to add more vegetables into our diet, as well as use up the garden excess. It seems foolish to freeze or can vegetables (though I do plenty of preserving too) if we are not eating as many vegetables as we can when they are fresh.
Last summer I brain stormed ways to add more vegetables to our diet plus make menu planning easier. It worked so well that I'm using the same system again this year.
These were my summer themes:
Sunday: simple (often grilling or a simple picnic lunch at a park)
Monday: stirfry (some type of marinated meat with whatever vegetable was in season)
Tuesday: salad (a main course salad like taco salad)
Wednesday: quiche (with seasonal vegetables) or other casserole full of veggies
Thursday: crock-pot (often this is my errand day)
Friday: pizza (again with seasonal veggies and often served with salad)
Saturday: grilling (often burgers)
Each week, I'd take a look at what vegetables were on hand or ripening in the garden and plan my menu specifics. Often I would try to plan ahead, maybe when grilling chicken I would do extra to add to a salad, or quiche, or pizza. The menu worked well because it was flexible but gave me a workable plan to alleviate the 5:00 what-are-we-going-to-eat tonight woes. The days of the week were very flexible with what I felt like making that night or what worked best with our schedule.
Just to give an example - here was our menu this week. Right now there isn't too much in our garden. We have kale, a little asparagus and lots of lettuce. As the garden selection increases so will my menu options.
Pork/asparagus stirfry on rice
Meat loaf and cheesy potatoes (a freezer meal) with salad
Kale/ham quiche
Pizza and salad
Chicken and frozen veggies in crockpot
Grilled steak with crockpot baked beans and salad
I'd love to hear your ideas for summer menu planning and how you incorporate seasonal veggies.
Friday, April 30, 2010
Sprouter
We just began growing our own sprouts this spring. We had recently found a great deal on a Thompson & Morgan sprouter. It has been working well for us.
My mom just found 20 brand new Thompson & Morgan sprouters at a yard sale. She bought one but there are plenty more!
I was wishing I knew someone who wanted one - so in the slim chance that someone will read this that lives local and wants a sprouter, I thought I'd mention it!
Give me a call if you want to know where to find one for yourself!
Edit to add: Oops! Forgot to mention that they cost $2.00. Usually they sell for around $20.00. Of course you can just use a jar and cheesecloth, but we liked how this sprouter worked.
Thursday, April 29, 2010
Book Review - Four-Season Harvest

"Organic vegetables from you home garden all year long." It was a bold claim. When I learned that the author Eliot Coleman gardened in Maine, the Four-Season Harvest went on my "must-read" list. I was thrilled to win this book in a giveaway from Homestead Revival.
Year round harvest brings to my mind forcing tomatoes in heated greenhouses, with subsequent expense and work. This book shares much simpler techniques for eating fresh produce year round. With cold frames and unheated tunnels, even in the harsh Maine winters, Coleman succeeds in growing food.
One of the keys of year round gardening is plant selection. No, it isn't possible to grow tomatoes, sweet corn, or watermelon in Maine January. But there are many vegetables that can be grown. Instead of wasting time, energy, and expense in growing heat loving plants, choose plants that will flourish in the lowering temperatures.
Though I expected lots of good advice on cold frames, this book also contained chapters on compost making, root cellars, and plant pests. The appendix contains a alphabetical list of all common (and some not-so-common) vegetables with growing info, storage tips, and favorite varieties. Interspersed throughout the book are stories from Coleman's winter trip to southern France. Surprisingly, Maine shares the same latitude as France. Though Maine has a harsher climate, they receive the same amount of sunlight, even in the middle of the winter, as the fresh vegetable capital!
Last year we experimented with growing salad greens in a small hoop house with good success. Now I'm eager to try a few new tips and maybe increase our winter harvest.
My favorite gardening books are written by gardeners who share from their years of personal experience. This book will join the ranks of authors like Gene Logsdon in my library. Some authors give so much information that gardening appears to be a task only for seasoned veterans. Four Season Gardening was an informative but immensely encouraging. It was the perfect spring read and one I'm sure to turn to often this summer and fall.
Tuesday, April 27, 2010
Frugal Gardening Tip #3- Grow Annual Flowers from Seed
 Buying a pack of annual flowers at the garden center isn't expensive. But if you want to cover a large plot of ground with color, or if you want a cutting garden, you can't get cheaper then planting annuals from seed.
But don't you need a greenhouse or grow lights, potting soil, and pots to grow plants from seed?
You don't need all that to start flowers from seed. You can start seeds in the house simply on a sunny window sill in paper cups. I usually start a few seeds just because I have the urge to get my hands in soil by February. But it isn't necessary to start plants indoors. Many flowers grow quickly and easily just by planting seeds directly in the garden soil.
This time of year, every garden center and even grocery stores have a seed rack. For a dollar or two you can purchase a pack of seeds that will produce an amazing number of plants. Seeds are one item that still gives a good return on the dollar!
Here are some of my favorite annual flowers to grow from seed. All these can be sowed directly in the soil. In fact, most of these flowers do not like their roots disturbed and will grow much better if they are started in the ground.
 Zinnia - The first flower I ever grew, these are perfect for beginning gardeners. Easy to grow and so bright and cheerful!
Cosmos- These flowers in shades of pink and white, always bring memories of my Grandpa's flower garden and the bouquets he would pick.
Marigolds - The classic easy plant for children. Planted in the vegetable garden, they help discourage some garden pests.
Nasturtiums- These flower seeds are huge and great for small hands to plant.
Morning Glories - A vine to plant along a fence or post.
Sunflowers - Not all are the familiar huge flowers. Pick a shorter variety or one of the special non-pollen varieties that are good cut flowers.
Many of these flowers are good for cut flowers. With a little planning, you can have fresh bouquets all summer. If you've checked the prices of cut flowers, you'll soon see that little pack of seeds is a real bargain.
I love Blooms for the Soul's idea of growing cut flowers to take to shut ins and nursing homes. What an encouragement and day brightener for a lonely person!
If you are not yet convinced of the frugality of growing annual flowers from seed, many of the flowers mentioned above are very easy to save seed from. Let a few zinnia, marigold, or cosmos flowers dry up on the stalk. Once they are very dry, cut the flower seeds and store in a dry place until next spring. If your plants were hybrids, the seeds may produce plants that are different then their parent but I've saved seeds from zinnias for years with great success. Buy a packet of seeds this year and you could go years without buying another pack!
It will soon be May, the safe seed planting date for our area. Go get some seeds and start planting some flowers to enjoy this summer!
Monday, April 26, 2010
Home library additions
"A home without books is like a room without windows. A little library, growing every year, is an honorable part of a man's history. It is a man's duty to have books. A library is not a luxury, but one of the necessities of life." Henry Ward Beecher
This past week found some new additions to our home library. I can't think of anything more fun then a day spent looking, feeling, and talking about books. Since the past week contained two such days - it was a good week!
First, I visited my first homeschool curriculum fair. What fun to actually see books I've only read about in catalogs. The best part was spending the day with the Naptime Seamstress and talking non-stop about books!
As fun as the curriculum fair was, the prices weren't what I like to see. I'm am spoiled from too many used book sales.
 But this past week was the date of the largest used book sale in our area. I missed this one last year because my baby was only a week old. It was such fun to go back this year.
I hauled 55 more books home and only paid $50.00. The most expensive book I purchased was $5.00 and the cheapest 30 cents with most of them $1.00.
Some of my favorite finds-
The Complete Tales of Beatrix Potter
James Herriot's Treasury for Children
A Child's Garden of Verses illustrated by Tasha Tudor
several field guides including Reptiles, Birds and Butterflies
and lots of great picture books
Next question: Where to put all these books?
Saturday, April 24, 2010
Enjoying God's World - April Nature Study Plans
 Maybe I'd better share this month's nature study plans before the month is over.
The weather this month has had us outside at every possible moment. I haven't had to force the children to go out for a nature walk amidst groans. Since my goal for my young children is very informal nature study, I'm sure they are not even aware of how much we've learned this month. They are constantly asking questions, poking sticks into holes, and bringing me something squirmy to identify. I hope they never lose their curiosity!

April Goals (What we've done or still hope to do in the next week.)
1. Look for blossoms on the early flowering trees. (Both the showy blossoms like cherry and the more discreet blossoms on the maple trees.)
2. Dig in the ground to find earth worms and other creepy crawlers.
3. Look for tree seedlings. Dig them out and find the seed or nut.
4. Grow some sprouts to eat. (Yummy additions to our spring greens salads.)
5. Examine the roots of a plant
6. Look for more signs of spring.
Thursday, April 22, 2010
Question: Cookbook for Children

This week my daughter and I made a honey cake from the recipe in her Pooh birthday card. I often have a helper (or two or three) hanging around when I bake. There is always the potential of a spoon or bowl to lick! But this time, she really wanted to help mix up the cake. She was delighted with the result!
I was again reminded of my goal of finding a good children's cookbook. I have fond memories of the cookbook I used as a child. Quinn and I were discussing cookbooks for children and so far, we haven't found exactly what we are looking for.
I'm sure I haven't seen them all, so I'm wondering if any of you have a favorite children's cookbook to recommend.
My perfect cookbook would have clear directions in large print for children to read. It would contain not just desserts (the fun stuff!) but also main dishes and healthier foods for a balanced diet. And I would like it to be lovely! Maybe because my husband is a printer but nicely done, well designed, good illustrated books really appeal to me.
Maybe the perfect book doesn't exist. Thanks for any suggestions!
Wednesday, April 21, 2010
Artisan Breads Every Day - final review
 I'm done! Thanks for traveling with me through this journey through Peter Reinhart's Artisan Breads Every Day. I'm sure I've bored you to death, but I've made every recipe in this book. I have not tried every variation, for example, I made croissants but not chocolate croissants or danish that use the same dough. There are enough variations on many of the recipes to keep me busy for another year! But I promise I won't bore you with any more recipe reviews.
I learned so much through this book. Peter is a gifted teacher, and like his other books, it is impossible to make his recipes without improving your baking skills.
 Most of these recipes are refrigerated overnight to improve flavor. At first I wasn't sure I liked this technique as it meant I had to think ahead, something I'm not always good at! But by now I'm sold! Often I would spend an hour mixing up two or three different batches of dough. The dough would all go in the fridge to be baked at leisure in the next several days. Splitting up the mixing from the baking seemed to fit a busy mom's schedule.
This method especially worked well if we were having guests. With the dough in the fridge, I could concentrate on cleaning up the house or other meal prep and still enjoy freshly baked bread with our friends.
 But the best part of this book was that time and time again I was simply astounded with the results. The flavor of these breads were simply wonderful. I could bake breads before, but with this book, true artisan quality bread is within grasp.
Tuesday, April 20, 2010
Frugal Gardening Tip #2 - Mulch
If "time is money" then any time saver is saving money - or that is the way I look at it.
And mulch saves time - lots of time.
We never mulched at my home growing up. Well, we did lay black plastic down in the melon patch but otherwise we relied on the tiller, hoes, and man (or child) power to beat back the weeds. It was a great project to keep children busy in the summer and I actually did not hate it. But by the end of summer, when the harvest was full swing, the weeds usually got the upper hand.
My husband's family were mulchers. And what a difference. By the time I met Ed's parents, they were retired and gardening was their hobby. My father-in-law mulched with newspaper between the garden rows and his garden was beautiful.
When we moved to our own home, we had a mower with a grass bagger. We use the grass clippings as mulch and enjoy a basically weed free garden. Our garden has continued to grow and we don't always have enough grass clippings but we mulch as much as possible.

Remember our new strawberry bed? Last week the plants were only a few straggly roots. A week later, there is new green growth and the row can be seen. The weeds haven't appeared yet but it is only a matter of time. Weeds in our old patch is one of the reasons we planted a new strawberry bed. We wanted to do what we could to eliminate the weed problem before it began.

Our strawberry rows are three feet apart. We needed to allow room for the strawberry plants to grow runners. We laid down one foot of card board between the rows. When we ran out of cardboard, we used newspaper.

We covered the paper with a generous layer of grass clippings. We pulled the grass clippings up around the plants. The runners should be able to root through the clippings.

We did the same to our new raspberry bed, using cardboard and grass clippings. (And you'll notice that I say "we". Ed does the work while I take pictures and say how wonderful it looks. And cook him a good supper. And take care of the children. And...well, I won't pretend I hold up my side of the team, but I try! I know I'm one blessed girl. And have I told you that he REALLY likes homemade bread?)
Some mulching tips -
If mulching your garden is a new idea to you, I'd encourage you to try it this year! I'm sure you could find a better use of your time then weeding!
And mulch saves time - lots of time.
We never mulched at my home growing up. Well, we did lay black plastic down in the melon patch but otherwise we relied on the tiller, hoes, and man (or child) power to beat back the weeds. It was a great project to keep children busy in the summer and I actually did not hate it. But by the end of summer, when the harvest was full swing, the weeds usually got the upper hand.
My husband's family were mulchers. And what a difference. By the time I met Ed's parents, they were retired and gardening was their hobby. My father-in-law mulched with newspaper between the garden rows and his garden was beautiful.
When we moved to our own home, we had a mower with a grass bagger. We use the grass clippings as mulch and enjoy a basically weed free garden. Our garden has continued to grow and we don't always have enough grass clippings but we mulch as much as possible.

Remember our new strawberry bed? Last week the plants were only a few straggly roots. A week later, there is new green growth and the row can be seen. The weeds haven't appeared yet but it is only a matter of time. Weeds in our old patch is one of the reasons we planted a new strawberry bed. We wanted to do what we could to eliminate the weed problem before it began.

Our strawberry rows are three feet apart. We needed to allow room for the strawberry plants to grow runners. We laid down one foot of card board between the rows. When we ran out of cardboard, we used newspaper.

We covered the paper with a generous layer of grass clippings. We pulled the grass clippings up around the plants. The runners should be able to root through the clippings.

We did the same to our new raspberry bed, using cardboard and grass clippings. (And you'll notice that I say "we". Ed does the work while I take pictures and say how wonderful it looks. And cook him a good supper. And take care of the children. And...well, I won't pretend I hold up my side of the team, but I try! I know I'm one blessed girl. And have I told you that he REALLY likes homemade bread?)
Some mulching tips -
- Free is good. My husband has a basically unlimited supply of cardboard boxes from work. We have a huge lawn so grass clippings are abundant as long as we have rain and the grass is growing.
- If you use newspaper or cardboard, you'll need to weight it down with rocks, dirt or something to keep it from blowing away. It also works well to soak the newspaper in a bucket of water first to make it easier to manage on a windy day.
- Aim for thin layers. A thick layer of grass clippings will become slimy and yucky. A thin layer applied often is much preferred.
- Keep in mind that the best mulch depends on what you are planting. Strawy manure is great if it won't come in contact with food. Maybe for a new strawberry bed that won't be harvested until the next year or around corn. Grass clippings can cling to things like green beans and make it more difficult to get clean. Choose something like newspaper for cleaner green beans.
- I like to mulch after a rain. If dry soil is mulched, rain fall may run off without sinking into the soil. A good mulch will help to hold in the moisture. We use drip irrigation right in the garden rows to maximize our water.
- This has not been a problem for us but if you have a lot of trouble with slugs, mulching may not be for you.
- Our garden has very good soil but it also contains a lot of clay. The consistent use of mulch for the past seven years has increased the humus in our soil significantly. Though we use a generous layer of mulch, with our humid summers and freezing winters, all the mulch material has completely composted by spring. I think of it as the lazy man's compost system. In another climate, mulching may not work as well. I love to pull back some mulch, dig in, and watch all the earth worms squirm. A picture of happy soil!
- We have found it best not to mulch late in the season. If the soil is covered with a heavy layer of mulch in the spring, it will take a long time to dry out and warm up. We usually add fall leaves and grass clippings to our compost pile or around shrubs, grapevines or other place that will not need tilled up for spring planting. That said, we are running an experiment this year with one sections of our garden. We covered it with shredded leaves this past fall. This spring we did no tilling but just chopped a hole and dropped in the broccoli and lettuce plants. We plan to plant corn in that garden as well with no tilling just pushing the seed into the ground. We'll see if it works!
If mulching your garden is a new idea to you, I'd encourage you to try it this year! I'm sure you could find a better use of your time then weeding!
Artisan Breads Every Day - English Muffins
 Finally! The last recipe review from Peter Reinhart's Artisan Breads Every Day.
I'm not sure who is most relieved that I've come to the last recipe in this book. Me - or you my long-suffering readers! I have learned so much about bread baking by working through this book - but I'm sure you would like to read about something other then bread!
I didn't save this recipe for last on purpose. It is not the most difficult recipe in the book. Since the English muffin dough is more of a batter, I needed to find some crumpet rings, which I finally borrowed from my mom. After making this recipe, I think I will need to purchase my own.
 These English muffins were simple to make and delicious. My husband, who just walked through the room, says they taste just like the bought ones, only better. I used the partial whole wheat variation. Maybe next time I'll try increasing the whole wheat even further.
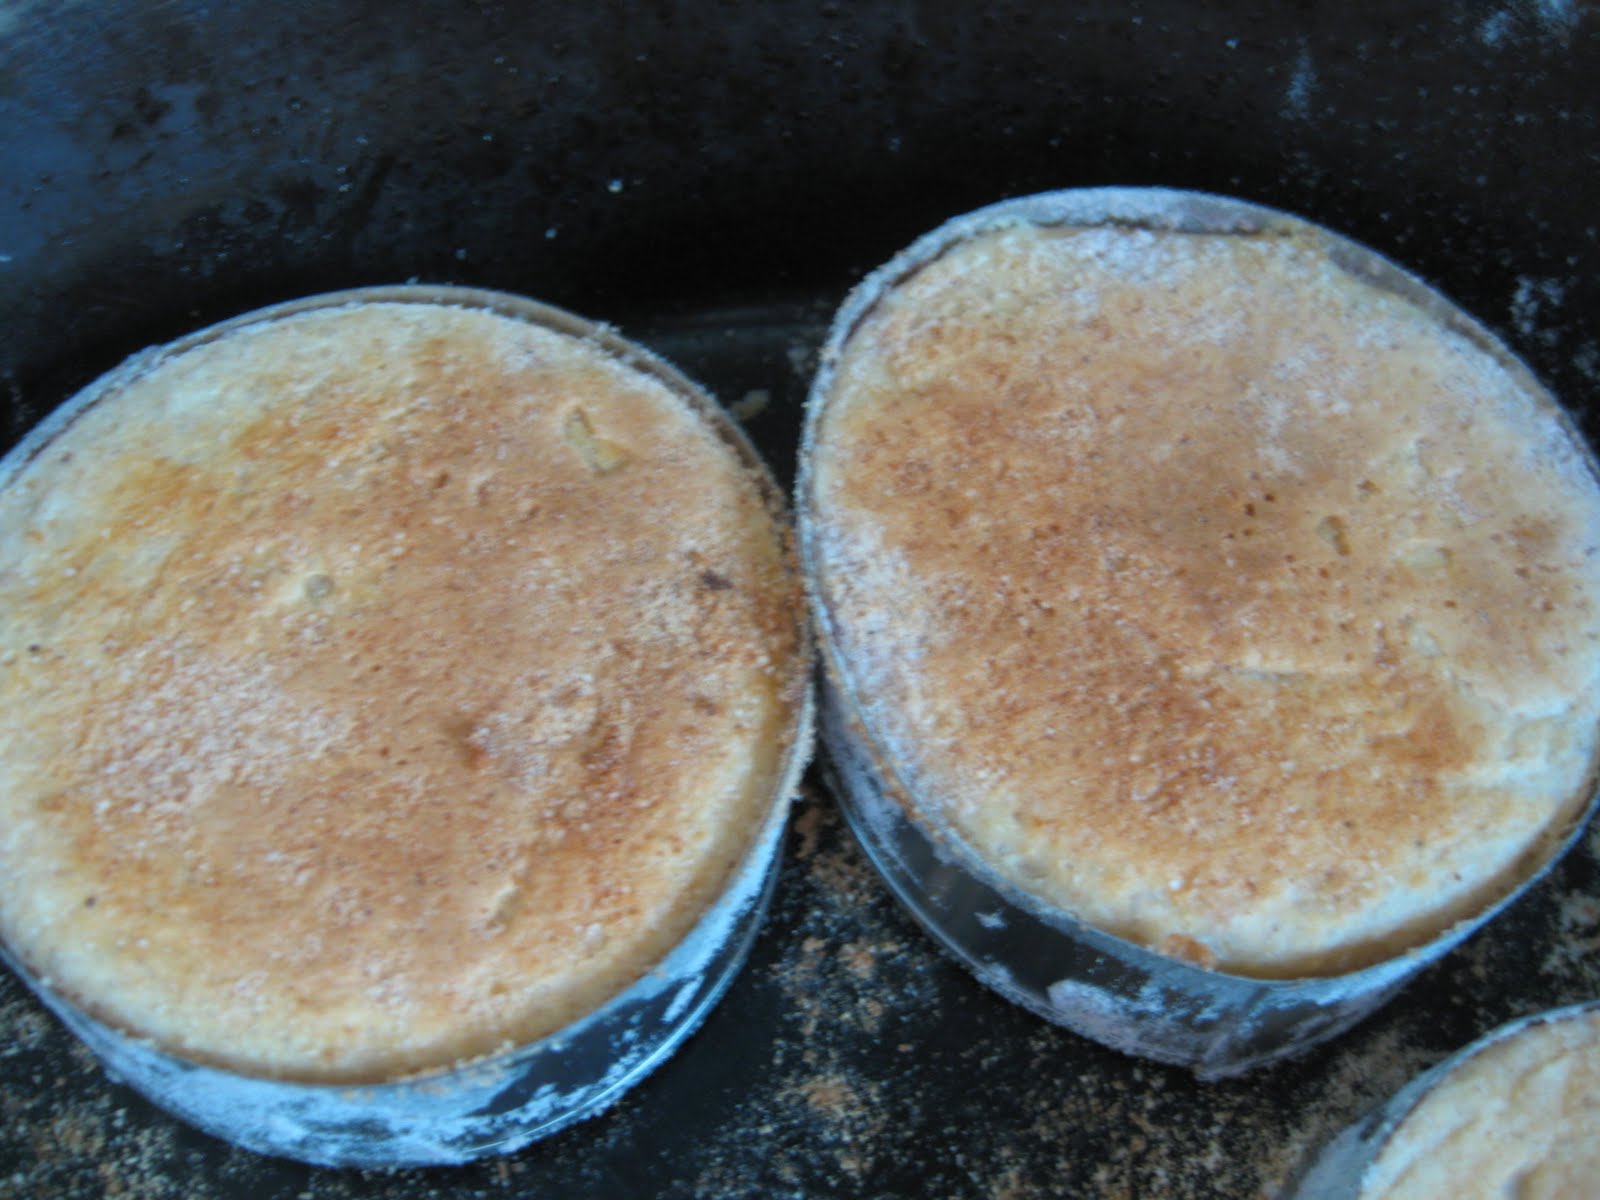 The dough was refrigerated overnight just like most of the other recipes in the book. Baking them in a griddle took time but wasn't difficult. The dough rose significantly and my first muffins spilled out over the side of the rings. All that rising made wonderful large holes for which English muffins are known.For the next batch I just used less batter and they were perfect.
Saturday, April 17, 2010
Artisan Breads Every Day - Croissants

Almost done! Another recipe review from Peter Reinhart's newest book.
This recipe scared me. I've wanted to make croissants for years but laminated doughs just freaked me out! I really wanted to try this recipe knowing that with Peter's hand holding, I probably could do it. But if I wouldn't have told you all that I was going to make every recipe in this book, I would have probably chickened out!
I'm glad I didn't! These were incredible!
The recipe wasn't difficult, just time consuming. Mixing the dough was easy, but laminating the butter between layers of dough took nearly all afternoon. Every 20 minutes I was rolling, folding, flouring, and working with this dough. The dough kept springing back on me and I struggled to get it rolled wide enough but finally I had all 81 layers.

The cutting and forming of rolls was simple enough and I impatiently waited for the dough to rise so we could get these in the oven. But baking these rolls wasn't without difficulties. All that butter started to melt out of the rolls. I had mistakenly placed these rolls on a flat baking sheet. Butter dripping on the oven coils caused flame ups and soon my kitchen was filled with smoke! Good time to check the smoke detector!

But the result was lovely despite the extra flames. I love how the layers separated inside. And one bite of these...Mmmmm!
The next pan I made sure had sides which avoided any problems. My husband enjoyed these for egg sandwiches for several mornings. I'm not sure this recipe will become a regular with all the extra effort involved but at least now I don't have to be intimidated by croissants!
Friday, April 16, 2010
Ragged baby quilt and other sewing projects
In the past months, I've done very little sewing (besides the never ending mending pile, which doesn't count!) But I thought I'd share pictures of a few of the projects that were completed.
 I always make a baby quilt for our babies before they are born. Since we don't know the gender, that means a neutral baby quilt. The quilt I made for our last baby was mostly white with a little yellow and blue. When our baby daughter was born, my oldest daughter begged for me to make her a girly quilt. When flannels went on sale last fall, I relented.
 This quilt was super simple. I cut rectangles 10 x 4 inches, sandwiched cotton batting in between two rectangles, and stitched it up. The basic method was like the denim ragged quilts I made the winter before.
 Here is my new bag, inspired by my cousin Carolyn's creative bags. If I had more time, I'd make a new bag every week! They are just too much fun!
 When growing up, I always wanted a sister to dress in matching dresses with me. I was the oldest in my family and after me were born four boys. My first sister wasn't born until I was 15. (Later I was blessed with two more sisters as well as another brother.) I immediately made her a dress to match mine but there was too big of an age difference and we never did it again, though I did make lots of matching dresses for the younger girls.
 But now I can sew matching dresses for my two daughters! My oldest daughter loves matching her little sister. And little sister couldn't care in the less about what she is wearing!
Thursday, April 15, 2010
Artisan Breads Every Day - Biscuits

More from Peter Reinhart's Artisan Breads Every Day.
Peter calls these the "best biscuits ever", which is a bold claim, but I think these biscuits live up to it! Soft, flaky, tender and wonderful flavor make these the best biscuits I've ever made. Of course, they are not low fat but I'm willing to support my dairy farming dad and enjoy the butter and cream in these biscuits.
The first time I made these, I followed the directions explicitly. I loved the idea of grating frozen butter. It made it so easy to work the butter in the flour. The dough was very soft and wet but I resisted adding more flour and turned it on the counter and did the folds as described. The results were without description! I stirred up some sausage gravy and we had a breakfast to dream of. (And my sweet husband watched the children so I could go for a brisk walk to help with some calorie reduction!)
The next time I made this recipe, was much more spur of the moment. One evening, my husband just decided he was very hungry for these biscuits and I decided to see how fast I could make this recipe. By doing some short cuts (no freezing the butter or dough resting time) we had biscuits from start to eating in 20 minutes. I also used half whole wheat flour in this batch. They were still wonderful! This time a few made it to the next day so we were able to find that they are almost as good the next day.
This is one great recipe. If you can borrow this book from the library and try one recipe, you won't lose with this one!
Edit to add: Check the comments! Quinn shares a link to this recipe! Thanks Quinn for finding this for us!
Wednesday, April 14, 2010
First Asparagus
 The first meal of freshly picked asparagus is cause for celebration at our house. After a winter of eating canned, frozen, or store bought vegetables - nothing beats that first taste of spring!
Asparagus is so easy to prepare. No shelling or peeling required.

After a quick rinse, I trim off the bottom inch or two, if it is tough then cut it up for the pan.
 Ed and I both grew up with asparagus served the same way. Though we now have other favorite recipes, this one is still a comfort food favorite.
 After briefly cooking the asparagus just until tender. Then drain and place on a bed of toasted bread.
 Pour over a simple white sauce.
 Sprinkle chopped hard cooked eggs. Our chickens are laying well right now so I was generous with the eggs.
 Sprinkle on some grated cheese and dig in!
Tuesday, April 13, 2010
Artisan Breads Every Day - Wild Rice and Onion Bread
 More recipe reviews from Peter Reinhart's book.
This is a soft bread that reminds me of the soft cheese bread, except it lacks the golden color. The wild rice adds little dark flecks and the onions gave a great flavor. We liked this bread toasted lightly for sandwiches.
 I replaced 3 cups of flour with whole wheat flour. I also added 2 T vital gluten. I increased the milk by 1/4 cup.
Since this bread follows the same basic directions and formula as the other loaves in this book, it was quite simple. Another fool-proof recipe from a great book.
Monday, April 12, 2010
First Birthday!
 Look who turns one today!

 You would think, as a mother of four, I'd be accustomed to this by now, but I can just hardly believe that my infant is now a toddler. She has grown so fast!
 We love our sunny little girl!
 Thank you, Lord!
Saturday, April 10, 2010
Planting Strawberries
Strawberries are one of my favorite things to grow. They are easy to care for and freshly picked berries beat anything purchased at the store.
In our area, now is the right time to plant out new strawberry plants. If you ordered plants, they should be arriving now. If you can't plant them right away, place the plants in the refrigerator until you are ready to plant. We planted our strawberry patch five years ago. It has done well and doesn't owe us a thing (last year we picked over 60 quart) but we decided to replace it with a new patch this year.
 Strawberry plants don't look very impressive. Just some scraggly roots with maybe a tiny green sprout. Don't worry. As long as they have a well developed root system, they will do well. Before planting, soak the plants in water for one hour or up to twenty four hours.
Prepare your soil by removing weeds, tilling well and adding any amendments. My husband dug a shallow trench and filled it with compost to give the plants a good boost.
 When planting strawberries, the goal is for the roots to be planted horizontal, instead of straight down in the hole. With one hand I held the plant, with the other I spread the roots out over the soil like a fan. Then I firmed the soil around the plant. You want to cover all the roots without burying the crown of the plant. Hope that made some sense! It is easier then it sounds.
Plants should be about 18 inches apart, though ours are closer then that since I didn't want to make another row and had extra plants. If some die, I'll have a few to use as replacements.
(By the way, I love these gloves. I usually hate gardening gloves because they get wet and soggy but my nails are in shambles all summer. Ed bought me this pair. They are comfortable, waterproof, and only cost a few dollars. The palm and fingers are nitrile coated and the back is a woven poly of some sort that helps them "breathe". They have been my constant companion this spring!)
Frugal Gardening -Cultivate Friendships with Experienced Gardeners
Gardening is an inexpensive hobby. There is not many activities or exercise programs that actually can help you cut your grocery bill. But before I married, I worked at a greenhouse and know that some people lay down a good chunk of cash on their gardening hobby.
I've been wanting to write a series on frugal gardening. But right now, the garden is calling me louder than the computer. We had some 80 degree weather this week! Unusual for April and I know it won't last, but for now, we are living outside!
This week we planted some raspberries, and I thought I'd just share one quick hint.
Frugal Gardening Tip #1 - Cultivate friendships with experienced gardeners.
Especially is you are a new gardener, an experienced gardening friend is invaluable. I have one friend that I call frequently with my gardening questions. Gardening books and the web have their place but nothing beats talking to someone in your own area with years of gardening experience. If I'm experiencing a problem, chances are great that they have also, or at least have some idea of where to start for a solution. They can also warn you of the mistakes they have made.
And, if you hang around a gardener, you may be offered free plants!

We wanted to plant a row of raspberries this spring. Two of my gardening friends offered us plants. One friend gave us red raspberries, and the other friend, blackberries. We bought three yellow raspberries but the rest of our 50 foot row is thanks to the generosity of friends!
 My husband tilled in some compost (another frugal gardening tip) before planting the berries. Hopefully, they will soon take off and supply our table with fresh berries.
Want to save some money on gardening? Go find a gardening friend! We love to share, both gardening knowledge as well as plants.
And someday, you can return the favor by sharing with another gardener friend!
Thursday, April 8, 2010
Artisan Breads Every Day - 100% Whole Wheat Hearth Bread
 Still working through Peter Reinhart's Artisan Breads Every Day.
Since we usually eat whole wheat bread, I was looking forward to trying this recipe. I made this recipe exactly as written.
 The flavor was excellent. The texture was also good. My only problem was that it flattened into very short loaf. I don't know if the picture shows it, but this loaf was barely an inch high!
I think my mistake lay in how I formed the loaf. I would prefer a loaf that would hold together better and raise up instead of out! The taste of this bread was good enough to deserve a retry.
Tuesday, April 6, 2010
Artisan Breads Every Day - Hoagie Rolls
 And still more recipe reviews from Peter Reinhart's cookbook.
This recipe makes a great chewy sandwich roll. My greatest difficulty was the shaping. My hoagie rolls looked like a distorted hotdog rolls. But my mom used this recipe and made some great looking rolls. So it is probably me and not the recipe!
Since I was having such shaping difficulties, I gave up and finished the batch with simple round rolls. These turned out beautifully. My husband loved them for hamburger rolls and I think this may be the recipe we turn to this summer for our summer picnics.

The recipe was simple to follow. As usual, I made some substitutions to add whole grains. I replaced three cups of the white flour with whole wheat and added 3 T vital gluten. I also increased the water by 1/4 cup. I should have increased the liquid slightly more and that may have helped my roll forming issues.
Try these rolls for your next sandwich and you'll find yourself staying light on the sandwich fillings so you can appreciate the bread!
Subscribe to:
Posts
(
Atom
)


