Wednesday, March 31, 2010

Resurrection Cookies

Easter is one holiday that seems to creep up on me unawares. I really hope to do more this year, but since this is already Wednesday, I'm not sure if it will happen. There is so many neat ideas on the web. I just need to start making plans earlier!

Last year, a friend shared this recipe for resurrection cookies. I didn't get a chance to make them, but maybe this year. I'll share it just in case you want to make these with your children.

1 cup whole pecans

1 teaspoon vinegar
3 egg whites
a pinch salt
1 cup sugar
a zipper baggy
1 wooden spoon
scotch tape
Bible

Instructions:
These are to be made the evening before Easter. Preheat oven to 300F. (this is very important --- don't wait until you are half done with the recipe).
Place pecans in zipper baggy and let children beat them with the wooden spoon to break into small pieces. Explain that after Jesus was arrested. He was beaten by the Roman soldiers. Read: John 19:1-3

Let each child smell the vinegar. Put 1 teaspoon vinegar into mixing bowl. Explain that when Jesus was thirsty on the cross He was given vinegar
to drink. Read: John 19:28-30

Add egg whites to vinegar. Eggs represent life. Explain that Jesus gave His life to give us life. Read: John 10:10&11

Sprinkle a little salt into each child's hand. Let them taste it and brush the rest into the bowl. Explain that this represents the salty tears shed by Jesus' followers, and the bitterness of our own sin. Read: Luke 23:27

So far the ingredients are not very appetizing. Add 1 cup sugar. Explain that the sweetest part of the story is that Jesus died because He loves us. He wants us to know and belong to Him. Read: Psalm 34:8 and John 3:16

Beat with a mixer on high speed for 12 to 15 minutes until stiff peaks are formed. Explain that the color white represents the purity in God's eyes of those whose sins have been cleansed by Jesus. Read: Isaiah 1:18 and John 3:1-3

Fold in broken nuts. Drop by teaspoon onto waxed paper covered cookie sheet. Explain that each mound represents the rocky tomb where Jesus' body was laid. Read: Matthew 27:57-60

Put the cookie sheet in the oven, close the door and turn the oven OFF.

Give each child a piece of tape and seal the oven door. Explain that Jesus' tomb was sealed. Read: Matthew 27:65-66

GO TO BED!

Explain that they may feel sad to leave the cookies in the oven overnight. Jesus' followers were in despair when the tomb was sealed. Read: John 16:20&22

On Resurrection Sunday (Easter) morning, open the oven and give everyone a cookie. Notice the cracked surface and take a bite. The cookies are hollow! On the first Easter Jesus' followers were amazed to find the tomb open and empty. Read: Matthew 28:1-9

Artisan Breads Every Day - Pizza Dough

Working through Peter Reinhart's bread book one recipe at a time!

I think it would be accurate to say that Peter Reinhart knows something about good pizza. He has written a whole book on the subject.

His latest book contains four pizza dough recipes, Neo-Neopolitan, Sourdough, 50% Whole Grain, and 100% Whole Grain.

I have tried all of them, and each one is terrific. They all utilize the cold overnight fermentation to develop the flavors. Since we love pizza, I mixed up several batches of dough and froze in freezer bags. As long as I remembered to pull out a bag of dough the day before, we enjoyed some wonderful for pizza with very little preparation.
The Neo-Neopolitian dough was the easiest to work with. It was very stretchy with lots of good gluten development. I am not good at pizza tossing but even I could get a good stretch with this dough.

The Sourdough pizza version was our favorite for flavor. I replaced 2 cups of white flour with whole wheat and added 1 T of vital gluten. It had a good stretch though not quite as good as the Neo-Neopolitian.

The 50% Whole Grain was delicious. A little harder to stretch but I think the addition of a little vital gluten could help.
We like to eat whole grains so the 100% Whole Grain pizza dough really interested me. This pizza dough was the softest. I was able to smooch it into the pan but it would have been impossible to toss. We really liked the flavor of this dough. It did not have the bitter flavor that some whole grain doughs have.

All these doughs were baked at the highest heat my oven could give, 550 degrees. The edges puffed up dramatically but the dough was quite thin in the middle. Since my husband prefers a thicker crust. I experimented with using more dough and not rolling as thin. Some of my attempts were underdone in the middle. My best results were with rolling it on a silicone mat and adding toppings. I preheated my oven and pan then placed the silicone mat with the assembled pizza on the pan. This yielded a pizza that was cooked to the center but still with a slightly thicker crust that my husband prefers.
Only one problem with these pizza dough recipes. Once you learn to make a really great pizza dough, most other pizza you eat will seem sadly lacking. On a recent visit to a good pizza shop in our area, my husband's opinion was that the topping were good but their dough had no flavor. Have you seen the ad stating "no one eats pizza for the crust"? Make one of these recipes and you will be fighting over the crust!

Tuesday, March 30, 2010

Sourdough Crackers


Since I've been experimenting with sourdough recently, I've had my eyes open for sourdough recipes. I didn't expect to find a sourdough cracker but this has become my favorite homemade cracker so far!

I found this novel recipe over at Kitchen Stewardship. It is a great way to use up any sourdough starter that you want to discard. The flavor of these crackers is wonderful. They remind me of goldfish, even though they contain no cheese! I'm glad these things are good for you because I can't keep from eating them!

The dough is soft and tender and I found it a little hard to roll out. When I baked the crackers, I found I was trying to roll them too thin. The thicker pieces puffed up into little pillows for an irresistible crunch! So don't sweat it if you don't think you have them rolled thin enough.

Sourdough Crackers

1 cup “discarded” sourdough starter
1/4 cup softened butter
1 cup whole wheat flour
1/2 tsp sea salt

In a large bowl, combine the sourdough and butter and mix thoroughly. Mix the salt in with 1/4 cup flour and add to the sourdough mixture. Knead it all together in the bowl, adding as much flour as necessary to make a stiff dough. Cover the dough with plastic wrap or put a lid on the bowl to prevent it from drying out. Leave the dough at room temperature overnight.
Seven or more hours later, preheat the oven to 350 degrees.
Divide the dough in four portions. Roll it out on a nonstick baking mat or parchment paper using a rolling pin, until it is very thin.
Garnish if desired. (I like a little garlic powder.)

Transfer to your baking sheet. Cut the dough vertically and horizontally into quadrangles with a pizza cutter. Bake for 15-20 minutes or until just golden brown.

Mmmm. Good!

Monday, March 29, 2010

Graham Crackers


What is it with children and graham crackers? My children can't get enough of them. I had no idea graham crackers were so easy to make until I tried a recipe from the Heavenly Homemaker. These were easy to make though the dough was soft and hard to transfer to the baking sheet. For best results, roll on a sheet of parchment paper so that the crackers can be just slid, paper and all, to the pan.

Whole Wheat Honey Graham Crackers

2 ¼ cups whole wheat flour
½ cup sugar
1 t. baking powder
½ t. baking soda
½ t. salt
¼ t. cinnamon
4 T. honey
¼ c. water
1 t. vanilla
1 stick butter, melted

Preheat oven to 350 degrees.
In a mixing bowl, stir together the flour, sugar, baking powder, baking soda, salt and cinnamon.
Add the liquids: honey, water, vanilla and melted butter.
Stir well until a nice ball of dough is formed.

Cut two pieces of Parchment paper the size of the cookie sheet. Lay one piece of parchment paper on the cookie sheet. Place the ball of dough on the parchment paper. Lay the other piece of parchment paper on top of the ball of dough. Squish dough down a little with your fist. Use the rolling pin to roll the dough between the pieces of parchment paper. Roll until the dough covers the whole cookie sheet. Remove the top piece of parchment paper.

Cut dough into 2 inch squares, or cut shapes with cookie cutters, being sure to separate the shapes from the surrounding dough a little. (I was too lazy for this step and they swelled up together and I just cut them after baking.)

Bake in oven for 18 minutes. Turn oven off, but leave crackers in the oven to get crisp. Remove from oven after 30 minutes to one hour. Break graham crackers apart. Store in a air tight container.

Saturday, March 27, 2010

Artisan Breads Every Day - Buttery Crackers


Yet another recipe review from Peter Reinhart's Artisan Breads Every Day.

I love the seed crackers, but these buttery crackers are my husband's favorite! The children gobbled them up, too. The dough mixed up very quickly and was easy to roll out. These crackers are so fast, you could bake up a batch while your soup heats up.

This recipe calls for all-purpose and cake flour. I replaced the cake flour with whole wheat with good results.

What to try them? I'll share the recipe!

Flaky, Buttery Crackers

1 1/4 cup all-purpose flour
1 cup cake flour (I used whole wheat flour)
1 tsp salt
1 T sugar
3/4 tsp baking powder
1/2 tsp garlic powder
10 T melted butter
1 egg
6 T cold milk
egg wash (optional)

Combine all ingredients. Mix for one minute with mixer or spoon. Dough should form a firm ball and shouldn't be sticky. Transfer dough to work surface and knead for about 30 seconds.

Preheat oven to 400 degrees. Divide dough and roll on well floured counter. Prick holes on surface of dough with fork. Cut crackers with pizza cutter or small biscuit cutter. Bake for 18-20 minutes or until dry and crisp. If baking more then one pan of crackers, rotate pans every 5-8 minutes.

Friday, March 26, 2010

Artisan Breads Every Day - Crispy Rye and Seed Crackers


Tired of recipe reviews yet? Here is one more from Peter Reinhart's newest cookbook.

Of all the many recipes that we've enjoyed out of this cookbook, the rye and seed cracker has been made most frequently. This recipe is simple and the results so delicious that there is no reason not to make them again. And again.

The flavor of these crackers is astounding. They leave a satisfying aftertaste that can't be imitated by any cracker from a box. Give them a try!

I have been hesitant to share recipes from this cookbook since it is newly published. I read an interview of Peter Reinhart recently where he stated that he didn't mind if bloggers shared recipes as long as proper credit is given. So I'm sharing the recipe for these crackers. I am abbreviating the directions. If you want to read the entire recipe, go to cookbooker.
1/4 cup sunflower seeds
1/4 cup pumpkin seeds
3 tablespoons flaxseeds
6 tablespoons sesame seeds
1 3/4 cups rye flour or whole wheat flour
1/4 teaspoon salt
2 tablespoons oil (I used olive oil.)
1 tablespoon honey
3/4 cup water, at room temperature
Egg white wash, optional
Garnishes, optional

Grind the sunflower and pumpkin seeds into a fine powder or flour in a blender or spice grinder. (I used my food processor.) Separately, grind the flaxseeds into a fine powder.
Combine the seed powders and the whole sesame seeds, flour, salt, oil, honey, and water in a mixing bowl. Mix for 1 to 2 minutes with a mixer or by hand. The dough should quickly form a firm ball and shouldn’t be sticky. Stir in flour or water as needed to adjust the texture.
Transfer the dough to a lightly floured work surface and knead for about 30 seconds to be sure all of the ingredients are evenly distributed and that the dough holds together. It should be slightly tacky but not sticky.
Preheat the oven to 300°F.

Divide the dough into four equal pieces. (For any that you won’t be baking right away, wrap them well, and refrigerate for up to 1 week or freeze for up to 3 months; the flavor actually improves after a day or two in the refrigerator.) Use a rolling pin to roll out one portion of the dough on a floured work surface, frequently lifting the dough to be sure it isn’t sticking and dusting with more flour underneath if need be. If the dough resists, gently set it aside and begin rolling out another piece, or let it rest for about 2 minutes. When you return to it, it will roll more easily. Garnish if desired.
Use a pizza cutter to cut the rolled dough into rectangles, diamonds, or other shapes. The crackers need not all be the same size. Transfer the crackers to the prepared pan. They can be nearly touching, as they won’t spread or rise. (I cut the dough right on the pan.)


If making more than one pan of crackers, you can bake them all at once. Place the pans on different shelves and bake for 10 minutes, then rotate the pans and bake for another 10 minutes. Rotate the pans once more and continue baking until they’re done—typically 25 to 30 minutes altogether, but it depends on how thin you roll them and on your oven.

Enjoy!

Thursday, March 25, 2010

Make It Yourself - Crackers


Almost a year ago, I admitted that I had tried making crackers. I fully expected a lot of eye-rolling disbelief. And maybe there was! But I was shocked at how many of you said "I want to make crackers, too!"

I have been amazed at how easy it is to make crackers. If bread baking scares you, try some whole grain crackers. They are simple to make - and delicious! Plus they won't have any questionable ingredients. I just checked the Ritz box and Graham cracker box. (Yes, both are in my cupboard now!) The ingredient list on both contained high fructose corn syrup plus some other big words of unknown meaning.

In the next few days, I plan to share some of my favorite homemade cracker recipes. But first I thought I'd share a few hints.

Unlike bread, in crackers you want to AVOID gluten development. When using white flour, use all purpose, and maybe add a little cake flour. With whole grain flour, crackers are a great opportunity to use rye, millet, oat, and other flours that make poor bread texture. I've made some great crackers by blending oatmeal in my blender.

Cracker dough can be soft and hard to roll thinly and still transfer to a baking sheet. I use a pastry cloth with generous flouring. Another option would be to sandwich the dough between two sheets of parchment paper or roll directly on a silicone baking mat. I find it best to work with a small ball of dough instead of the whole batch at once.

You may cut circles or fancy shapes for your cookies. I choose the easiest method. Once my dough is rolled thinly, I place it on the baking sheet and cut into squares with a pizza cutter. Sometimes it doesn't cut right up to the edge, but we usually have these pieces nibbled on before they are cool.

Most crackers shrink a little while baking so there is no need to separate the pieces before baking. Graham crackers are an exception. For graham crackers, pieces should be separated before baking to give room for expansion. Or just do as I do and cut them apart after baking while still warm!

I bake two pans of crackers at a time in the oven. Every five minutes I switch the pans so that they brown evenly.

Part of the fun of making crackers in the garnishes. Usually I just sprinkle some salt or garlic powder but you may get more creative! To help the garnishes stick to the dough, whisk an egg white with 2 T water. If making a sweet cracker you may whisk 1 T honey with 3 T water. I usually garnish before cutting the crackers.

When crackers begin to brown in the oven, they are probably baked. They will continue to crisp as they cool. If they don't seem crisp enough. Return them to a low oven to dry out some more.

Have fun cracker making! And let me know if you have a favorite recipe for me to try!

Wednesday, March 24, 2010

Finding Used Book Sales

If you've ever walked into our house, you know we love books. And not only do we enjoy books, but we hoard them. I admit it. It is an addiction. For every book we get, there is two more that I want. We have bookshelves in every room of the house but the bathrooms. A couple years ago I loss track of how many books we have when the number reached 1000.

With six book lovers (the baby likes to chew books) in the household and plans to homeschool our children, I don't see our book collecting coming to end any time soon.

But amassing our book library has cost us very little. Ed and I enjoy a date night at Borders but we never ever buy books there. We almost never buy a book new, and when we do it is usually given as a gift.

Earlier this week, Money Saving Mom shared Five Ways to Get Books for Free.

Besides the first way (asking for review copies) we have acquired books to read through each of her methods. (The others ways are Paperback Swap, Swagbucks, borrow from library and friends.)

But she didn't mention used book sales. This may not be free, but it is sure cheap. Most of our books have been bought at used book sales. I sometimes pay as much as $3.00 but usually it is a dollar or less. At times I've filled a grocery bag for only a dollar or two. One time I came home with 60 books for the grand total of $8.00. No wonder, bookstore prices have me gaping in disbelief.

Used books can be found many places. Yard sales and the Goodwill usually have a book table. But for a book addict, there is nothing more fun then a huge book sale. At one time, I thought our area only had one a year. But the last few years, I've found numerous book sales in my local area.

Want to find one in your area?

  • First, check the Book Sale Finder. Click on your state for a listing of book sales in your area. This is a great place to start, but usually lists only large sales. I only found two sales listed for our area and I know of quite a few more that were not listed.
  • Next, get out the phone book and call all the libraries within the range you'd would drive for a book sale. Many libraries have a book sale once or twice a year.
  • Next, start talking. Let others know that you are interested in book sales. Go to one of the larger sales in your area and if you find a friendly person, ask if they know of any others sales in the area. Most book lovers are friendly folks!
  • Watch the events section of the paper. In our area, the historical society, a local church, a private library and a Christian school all hold excellent book sales for fund raisers.
  • If you are a homeschooler, many curriculum fairs have a vendor that sales used books. Sometimes homeschool support groups also hold used book sales.
Just keep your eyes open and you may find more book sales then you have time to attend. Or at least that is what has happened to me.

With a little experience, you'll learn which book sales are the most worth your time. Some are well organized, and some are not. Some attract huge crowds with long lines waiting for the doors to open, while at others you can go the second day and still find a good selection. Sometimes I stand shoulder to shoulder with fellow book lovers, and other sales I can bring the children and a huge stroller and not lose my sanity.

When you do find a great book sale, ask to be placed on their mailing list. Many will mail out cards the next year. If there is no mailing list, jot down the date on next year's calendar to remind you to give them a call when the time nears.

To me a day spent at a good (meaning huge, cheap, well organized) book sale is one of the best days of the year. Better then Christmas or birthdays! Like the Gold Rushers, I just may be obsessed with digging for buried treasures. If I have to count it as one of my bad habits, I'm at least grateful that it is cheap and my husband and children appreciate the nuggets I haul home!

If you live in the local area, I'd be glad to share the dates of some of my favorite sales. Just drop me an email.

Tuesday, March 23, 2010

Frugal Family Celebrations

For both Ed and I, going out for ice cream was one way our families celebrated the completion of a big job. I remember enjoying a soft serve cone at our favorite little country store at the end of haymaking.

Ice cream is cheaper then eating out a whole meal. But as our family grows, it still adds up!
Ed spent Saturday cutting wood and the children helped him stack it in the woodshed. When he returned the borrowed truck, Ed stopped at the store and allowed the children to pick out their own flavor of ice cream. The cost was about the same as a trip to the ice cream store and the smiles were a mile wide!

Usually we only open one box of ice cream at a time, but we have three birthdays coming up and knew the ice cream would be consumed before it went bad.

Tired muscles + a few dollars = thrilled children and a memorable family celebration!

Friday, March 19, 2010

Artisan Breads Every Day - Challah

Another bread recipe review from Peter Reinhart's book.

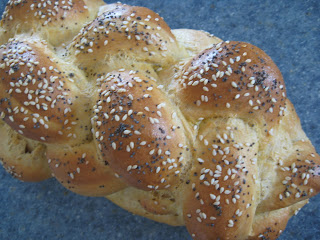
The Challah recipe made a beautiful loaf! I love how all the eggs made the dough golden. I divided the dough into three loaves. I tried a three strand braid, four strand braid, and six strand braid. The directions were easy to follow and the four strand loaf was my favorite.

The texture of the bread was open and airy. We made some french toast with some of the leftovers and it acted like a sponge pulling the milk into the bread perfectly!

I replaced 4 cups of the white flour with whole wheat flour and added 3 T vital gluten. I increased the water to a total of 2 2/3 cups. I thought it maybe lacked salt. The recipe seems to call for enough so I'm wondering if I just goofed.
Another wonderful tasting bread that was easy to make, fun to work with, and yielded spectacular results!

Thursday, March 18, 2010

Artisan Breads Every Day - Straun


Continuing through Peter Reinhart's new bread book.

This is a soft sandwich type bread that contains many different grains including cornmeal, oats, wheat bran, and brown rice. My loaves were a little heavier then some of the other recipes but the bread was very delicious. I like it toasted with butter and honey! Mmmm!

I substituted 3 cups of whole wheat flour for 3 of the cups of white flour and also added 3 T vital gluten. I increased the water by 1/4 cup. Next time I'd like to try the variation of adding some sourdough. I think the flavor would even be better!

Freezer Cooking Day


The freezer cooking day that was planned two weeks ago was postponed to this week since I had sick children earlier. It was a full day, but I was very pleased with how much we accomplished.


It was fun to work with a friend and certainly made the time go faster. The best part was having help with all the dishes!

Since our orignal date was canceled, my sister was not able to come and help. Having six children underfoot with only two adults was a little crazy, especially since three of them were under two years old! But they actually did well. Thankfully it was a nice day and they could play outside part of the time.

The results -
six turkey pies
four pans of meatballs
four pans of poppy seed chicken
two loaves of sourdough bread
four dozen strudel muffins
three pans of granola bars

The conclusion - a full freezer + a happy mommy = definitely worthwhile!

Wednesday, March 17, 2010

Sourdough Sucess!


If you have been following along here at Home Joys for a while, you may remember some of my dismal sourdough failures.

In the past several years, I have tried four times to start my own sourdough starter - to capture some wild yeast to put to work in making bread. I've learned a lot but mostly I've made a lot of bread that was fit for nothing but croutons or bread crumbs! My best results, by far, was with Peter Reinhart's recipe in his newest book. That starter actually worked but it was very slow and the results with 100% whole wheat bread were not so great. I think if I would have continued to use it, it may have gained strength and eventually become a good starter.

I've considered buying a starter but never did. Then about two weeks ago, Old Sourdough left a comment offering to send a sourdough starter. I didn't get too excited. I mean, who gives something away for free. It probably wouldn't work anyway. But I gave my address and just a few days later, received a package in the mail. In the envelope was a small bag of white powder which supposedly was dehydrated sourdough. I certainly didn't have high hopes, but I followed the directions to build it up for a few days then tried baking a loaf of bread.

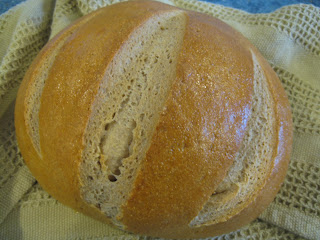
And this is the result!!! A beautiful loaf of bread on the first try!!!

I had been feeding my starter with my freshly ground whole wheat flour. The first loaf I made with one cup white flour and one cup whole wheat flour. Yesterday I made another loaf, this time with all whole wheat and the result was another beautiful loaf!

This bread was the simplest bread I've ever made! Just dump 2 cups sourdough starter, 2 cups flour, and 1 tsp salt in a mixer with a kneading hook. Mix for 15 minutes. Add a tsp or 2 of water if it is too dry. Dump into bowl to rise for 2 hours. Form into a loaf. Rise for another 2 hours and bake! Then try not to eat the loaf all in one sitting!

Now you may be wondering, why bake with sourdough?

  • It is cheap - no need to buy yeast!
  • It is supposedly better for you then yeast. But I'm no doctor.
  • It tastes GOOD!
And that is enough reasons enough for me!

I'm still a beginning sourdougher. Next I want to try sourdough waffles. If any of you want to join me, ask Old Sourdough for your own free sourdough starter - or, if you live nearby, stop in at my house. My sourdough is bubbling in it's bowl and I'd be glad to share!

(I know my husband is going to give me a hard time about all the exclamation points I've used in this post! Can you guess that I'm excited?)

Tuesday, March 16, 2010

Q&A - Vital Wheat Gluten

Lydia asked a question last week about vital wheat gluten. Since it is a question I have received repeatedly, I thought I'd answer it here instead of in the comments.

First Lydia's question:

What is the vital wheat gluten you talk about? Where do you get it? Is it anything like dough enhancer?

Gluten is a protein naturally found in wheat flour. Depending on the type of wheat and kind of flour, gluten is found in larger or smaller amounts. Gluten is what allows bread to rise to the light airy loaves that we are accustomed to. Hard wheat is high in protein and gluten. Soft wheat is low in gluten.

In flour products, vital wheat gluten (or just vital gluten) has the highest levels of protein, about 75%. It is not to be confused with high gluten flour which is flour with high gluten levels. High gluten flour is especially good for bagel and pretzel making. Bread flour is also high in gluten and is good for making (surprise!) bread. All purpose flour is a mixture of hard and soft wheat and good for a variety of baked goods. Cake or pastry flour is good for cakes, biscuits, and anything made with baking soda or powder.

When to use vital gluten

I add vital gluten to bread to improve the texture and elasticity of bread. When using white bread flour, vital gluten is not necessary. But when using whole grains, vital gluten can improve the texture dramatically. To quote Peter Reinhart "The bran fiber in the whole grain flour, while extremely beneficial in our diet, acts like little razors in the dough, cutting the thin gluten strands. This makes it difficult for the loaf to rise as high as white flour loaves."

Rye, oatmeal and other grains are low in gluten and can improve with the addition of some extra gluten. Also in bread containing seeds, dried fruit or nuts, vital gluten can boost the gluten development.

How to use vital gluten

Too much vital gluten can harm the bread's flavor. A little goes a long way. As a rule of thumb, use 1 or 2 tsp per cup of flour. In most recipes, I add 2 or 3 T of vital gluten along with the flour.

When not to use vital gluten

Vital gluten is only needed in yeast breads. Do not use vital gluten in quick breads like banana bread, or muffins, biscuits, or any bread that uses baking soda or powder for the leavening ingredient. In these baked items, you do NOT want to encourage gluten development.

Another time NOT to use vital gluten is if you are cooking for someone with a gluten allergy. The reason should be obvious!

Where to find vital gluten

I purchase vital gluten at my local bulk food store. You will find it with the other flours, usually in a small quantity. I have found it online at King Arthur's Flour and Bob's Red Mill. Hodgsons Mill brand is found on Amazon and I think I've seen it before at Walmart.

Is it like dough enhancer?

Dough enhancer usually contain vital gluten along with other ingredients that improve the texture of yeast breads. You can make your own dough enhancer with this recipe.

Did I answer all your questions?
If you have been disappointed by your whole grain bread, vital gluten is one of the secrets of the commercial bakery, and may be worth trying! If you think that whole grain bread has to look like a hockey puck, you may be surprised! I think it really does help the quality of bread!

Saturday, March 13, 2010

Growing Plants on a window sill

I like to start a few plants in the spring. But I really don't have a good spot to grow seedlings. Right now I have a small folding table next to the window in my bedroom trying to catch enough sunlight for some tiny alpine strawberry plants.

In Ed's Garden Gazette, there was a tip to maximize your light by reflecting the sunlight back to the plants. I was going to build a small unit like described when I remembered my husband's solar oven. It was just the right size to hold my plants and seems to be working well so far.

I'm going to copy the whole tip as found in the magazine. If you are trying to start some plants on your window sill, maybe you'll find it helpful!

Window Box Trick
by Ed Beachy

Try this method to yield nice, straight seedlings on a window sill. Generally, they lean toward light, as light is vital to a plant's growth.This results in leggy, spindly plants.Providing light from all directions will produce a strong, stocky, straight plant. It's as simple as using aluminum foil as a reflector.

I used OSB board, stapling a cover of foil to it. I screwed the three sides pieces and the top together. Another option is using a cardboard box, removing the bottom and one side. Plan your set-up so it can be lifted to water the plants.

When starting seeds early in the year (January/February), you will have greater growing success by adding overhead supplemental lightly to enhance short-day, natural light. Design your window box large enough to maintain a 2-foot grow light, which supplies ample light for a flat of plants. Two hours of grow light in the morning and two hours in the evening will produce good results.

Reprinted by permission from Ed's Garden Gazette.

Subscribe!

Notice something new?

I finally (after a whole year of wanting to do it) set up Feedburner. On the right hand column you should find a box where you can sign up to read this blog with a RSS feed reader (like Google Reader) or by email.

I find that reading blogs through a feed reader is a great way to maximize my computer time. I can review a large amount of online content in a short amount of time. It is like having a secretary open up the mail for me, throw away the junk and organize the information I do want to read all in one neat stack! And if I don't have much computer time, I can always hit the "mark all as read" button and it all disappears!

RSS Feed Readers are probably old news to most of you - but I'm constantly amazed at how many have never heard of it - or never tried it out. You can read more about a RSS and how to set up a feed reader at Molly Piper.

Friday, March 12, 2010

Artisan Breads Every Day - Crusty Cheese Bread


More good eating from Peter Reinhart's new bread baking book.

This bread is addictive. I couldn't just eat one piece! Something about the chewiness, the slightly sourdough flavor and, of course, cheese add up to great bread! Plus the cheese oozing out of the slashes just looks cool!

This bread is very similar to the soft cheese bread. It has some sourdough starter for flavor enhancement but includes yeast also. I omitted the onions this time since I was serving it to someone who might not appreciate onions. Two cups of flour were replaced with whole wheat flour, 2 T vital gluten added and milk increased by 1/4 cup.

A simple recipe that will appear again to our table.

Wednesday, March 10, 2010

Overnight Coffee Cake

I've been trying to get out of the breakfast rut and add some variety to our mornings. This is another simple breakfast dish that can be prepared the night before.

1/2 cup butter, softened
1/2 cup brown sugar
1/2 cup white sugar
2 eggs
2 cup whole wheat flour
1 tsp baking powder
1 tsp baking soda
1 tsp nutmeg
1/2 tsp salt
1 cup sour cream (or yogurt or kefir)

Beat butter and sugars together. Add eggs. Mix in dry ingredients and sour cream until just blended. Spread batter in greased 9 x 13 pan. Sprinkle with cinnamon sugar and nuts (almonds, walnuts, or pecans) if desired. Cover and chill overnight. Bake at 350 degrees for 30 minutes.

Artisan Breads Every Day - Bagels

Another terrific recipe from Peter Reinhart's Artisan Breads Every Day.

If you have been following along as we worked through this cookbook, you already know that we have enjoyed some good bread. But the day we made cinnamon raisin bagels was the first time that the children and I bit into the still warm bread and immediately packed up and went to visit Dad so he could have some too! With four children, visiting Dad at work is a rarity. But we knew how much Ed enjoys bagels, and (how can I say this humbly) these were the best bagels I've ever eaten.

I've made bagels in the past. There is a few extra steps, like boiling in soda water, that keep me from making them often. This recipe, though tipped the scales. Bagels this good are worth a little extra work!

I used the option of adding cinnamon and raisins. I also replaced 1 1/2 cups of white flour with whole wheat flour and added 2 T vital gluten. I increased the water slightly to a total of 1 1/3 cup.

I mixed up the dough and placed the dough in the fridge in a bowl and formed the bagels two days later. I ran into a little difficulty with shaping. The raisins had hydrated and pulled the moisture out of the dough. Around each raisin, the dough was punk dry. I thought the dough was ruined but in an attempt to salvage it, I wet my hands liberally while I formed the dough into bagels shape. This made the dough harder to work with and the bagels were lumpy and misshapen but the dough hydrated enough that the outcome was delicious! Next time I'll pre-soak the raisins in hot water before adding them to the dough.

The recipe makes six huge bagels. I doubled the recipe so that there would be a few for the freezer. They stored well, but didn't last long there either!
Do you want to try this recipe? You can find it on Cookbooker!

Tuesday, March 9, 2010

Overnight Yeasted Waffles


We are waffle fans and have waffles at least once a week. I've been perfecting our waffle recipe ever since we were married and thought it was perfect. But when I made the chocolate waffles, I was given some new ideas!

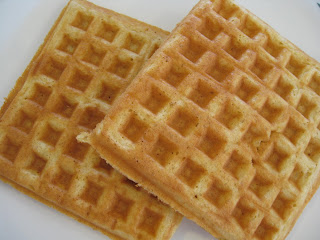
I always had trouble using 100% whole wheat flour as the waffles would be heavy and stick to the iron. The chocolate waffle recipe was mixed the night before with a small amount of yeast. In the morning, egg whites were beaten and added to the batter. This made the waffles very light. In experimenting with whole wheat flour, I found that adding the beaten egg whites kept the waffles light even with all whole wheat flour. Separating and beating the egg white was an extra step but since all the other prep was done the night before, it still was a quick breakfast.

Give it a try! We like them with peanut butter and syrup or a dollop of yogurt.

Overnight Yeasted Waffles

2 cup whole wheat flour
2 T honey
1 tsp salt
1/2 tsp yeast
1/4 cup butter, melted
2 cups milk
3 eggs, separated

Mix dry ingredients in bowl. Stir in butter and milk. Cover bowl and sit on kitchen counter overnight. In morning, heat up waffle iron and separate eggs. Whisk yolks into the batter and whip whites to soft peaks. Gently fold whites into batter. Do not over mix. A few lumps are fine. Cook batter in waffle iron.

If you have leftovers, cool on rack, wrap in plastic bag and freeze. Reheat in toaster for quick breakfast.

Monday, March 8, 2010

Enjoying God's World - March Plans

Nature study plans with young children.

This February was a brutal month for any outdoor activity! One morning I walked out in the kitchen to find negative five on the thermometer outside the window! That is enough to make me bury my head back under the covers like the groundhog that saw his shadow! Add to the freezing temperatures, snow that reached my children's waist - and we didn't do much on the line of nature walks last month!

But the snow is almost gone, the sun is definitely warmer and this morning (the day I typed this) I actually took a walk! This was the first time I've walked further then our chicken house for eons! I think spring is winning and am excited again about exploring the world around us with my children!

March Nature study ideas

  • Listen for the early birds. Maybe get a recording from the library and try to identify some bird calls.
  • Watch for birds building their nests, clean out the bird houses, try building a nest ourself. (To appreciate God's wonderful design that allows birds to make intricate structures with a bill and two feet!)
  • Make a pinwheel or wind vane.
  • Force some forsythia branches indoors.
  • Wrap some bean seeds in a damp paper towel, place in jar, and watch them sprout.
  • Start a list of "spring firsts". (dandelion, robin, bumble bee, etc)
And, of course, start the garden if it dries out enough this month! For a full list of March garden chores go here. We may also start some seeds indoors.

Friday, March 5, 2010

Question: Berries

I loved learning from you all about our broody chicken (who went "un-broody" before we could get a separate pen built - but we are ready now if it happens again!) and thought I'd ask another question!

With our growing children and their love of fruit, we decided to try to grow more of our own fruit. Tree fruits scare me but berries seem within our capabilities. Last year we planted a few blueberries. Now we are thinking of adding raspberries and blackberries.

I would love to hear of your experiences with any kind of berry. Do you have any recommendations on good varieties for the northeast? Is there anything we should be aware of as we prepare the soil? What kind of support system have you used for raspberries (black, red or yellow)?

We also want to plant more strawberries. Right now we only have one variety. We would like to expand our patch to have several varieties which ripen at various times. Any hints on good ones?

What supplier have you used? We will probably order from Berlin Seed unless you have a better idea!

Thanks so much for your help!

Thursday, March 4, 2010

Take Time for Tea


The past week or so hasn't been the best. Last week the baby was teething and wanted to be held every waking moment. This week the children are taking turns with the sick bugs. Four goopy noses, hacking coughs, and fevers mean I'm ready to clock out for a few hours, or days! Except that mothers don't get days off!

Then I read a post written by a mother of a two year old in the final days of a fight against cancer. I'll share an excerpts.

"The house is quiet. I am able to go through the motions of laundry, dishes, cooking and picking up without interruptions. But I WANT interruptions. I WANT Layla to be under my feet asking for cookies. I WANT to hear her playing with her toys. I WANT to take 45 minutes to unload the dishwasher because she keeps trying to help. For every time I uttered the words “I just can’t get anything done with these kids under my feet all day” I am eternally regretful. The days that I looked forward to naptime so I could get a grocery list made, or finally fold all the piles of laundry…I regret those days too. If I could do it all again, I’d enjoy EVERY SINGLE WAKING MOMENT I had with her. I would never wish for her to sit still or take a nap or go to bed early. I would treasure every second with her."

Read the whole post at LaylaGrace. How convicting! Once I could see again, I looked around my home. I saw my five year old who has begged for me to have a tea party with her while the younger ones nap. Always I list my reasons why I can't - at least not now. Maybe when I finish the laundry, or making supper, or cleaning, homeschooling, emailing, etc. Always some excuse. But am I treasuring the time that I have with my five year old? Will I some day look back with regret for all the moments I didn't spend with my daughter and her siblings?

So we had a tea party. It was quite simple. We made chocolate chip scones together. My daughter set the table herself choosing her favorites from my tea cup collection. We filled the tea pot with water, since she hates tea of any kind. We sipped our water out of thin china cups with our warm scones. Simple. But important.

Maybe I'm learning. But I'm writing this down here because tomorrow I'll need reminded. And the next day. And the next.

And if you want to make scones for your own tea party...I'll share the recipe. This is a Taste of Home recipe that Mum in Bloom shared. I adapted it slightly. These were delicious warm and even good cold!

Chocolate Chip Scones

2 cup whole wheat flour
1 cup flour
1/3 cup sugar
2 1/2 tsp baking powder
1/2 tsp baking soda
1/2 tsp salt
3/4 cup cold butter, cubed
1 cup buttermilk or kefir
1 cup chocolate chips

Combine dry ingredients. Cut in butter until mixture resembles coarse crumbs. Stir in milk just until moistened. Stir in chips.

Turn on floured surface and knead gently. Divide dough in half. Gently pat each portion into 7-inch circle. Sprinkle with cinnamon sugar. Cut each circle into six wedges. Place on baking sheet. Bake at 425 for 12 minutes. Serve warm.

Take time for tea today. (Or however your child needs your undivided attention.)

Wednesday, March 3, 2010

Books on Home Organization

I've noticed the past few years, the first books I read in a new year are about home organization. Must have something to do with a renewed goal of becoming a better and more efficient homemaker!

Last year I read several of Sandra Felton's books including Smart Organization and The Messies Manual. I loved the way Sandra described working "smarter" and not necessarily "harder" at house cleaning. Maybe it is obvious, but I'm learning that a neat home is mostly realized by having good routines and habits.

If I did everything I read, I would never need to read another organizing book but I'm not naturally a neat person and I need a regular "shot in the arm"!
From Clutter to Clarity: Simplifying Life from the Inside Out
The first book I read this year was From Clutter to Clarity by Nancy Twigg. This book was unlike many of the other organization books I've read. While it had chapters on home clutter, the bulk of the book focused on internal clutter.

Nancy's definition of clutter is "anything that complicates your life and prevents you from living in peace as you live out your purpose". Clutter can be the junk mail on the counter or wrong attitudes. I really enjoyed the reminder that there are things much more dangerous to a life then a dirty bathroom. A junky drawer may lower your efficiency as you hunt for an item but worry, bitterness, and pride are debilitating to a home. Nancy takes each area through the principles found in Hebrews 12:1-2 which are: throw off what hinders you, persevere through difficulties and focus on Jesus.

A few quotes from Clutter to Clarity.

"Even noble pursuits become clutter when they endanger our sanity and leave us with no time to connect with God."

"Being content clarifies life by keeping us focused on reality, not on the inevitable what-ifs and if-onlys."

"Clutter is too much of things that contribute too little."

"Satan's goal is to keep us looking to anything and anyone but God for help."

"As long as we look to money to solve our problems, we promote it to the status of deliverer - a distinction God alone deserves."
Confessions of an Organized Homemaker: The Secrets of Uncluttering Your Home and Taking Control of Your LifeThe second book I read Confessions of an Organized Housewife by Deniece Schofield. I was thrilled to find this book at a yard sale last summer. I remember my mom reading this book and beginning a filing system that she is still using twenty years later!

Confessions of an Organized Housewife has two sections. The first describes the basic principles of organization such as "think before you act". The second section takes each area of our home and gives practical ideas on how to implement the organizational principles. While not all of her ideas would work for everyone, they may lead to ideas that will work for you.

Do you have any favorite organizing/homemaking books?

Tuesday, March 2, 2010

Four-Season Harvest


Look what came in the mail today! Four-Season Harvest by Eliot Coleman arrived from a giveaway by Homestead Revival. I have never won a give-away before. I was thrilled to win this book as it has been on my wish list, my local library doesn't have it, and I almost purchased the book.

Four-Season Harvest describes the author's method of growing vegetables year round with the help of cold frames and a unheated greenhouse. What excited me was that he gardens in Maine, which has harsher winters then we do!

We all know we should eat more fresh vegetables and nothing beats vegetables you've grown yourself for freshness, flavor, and vitamins! I've been trying to extend our growing season and have learned a lot from our little hoop house this past year. In the few hours this book has been laying on my kitchen counter, I've opened it up to random pages and have already learned a some new things to utilize in our garden this year!

I'm sure you will be hearing more about this book! Thanks to Homestead Revival for giving me this opportunity!

Artisan Breads Every Day - San Francisco Sourdough Bread


Another recipe review from Peter Reinhart's newest bread baking book.

I've made another attempt at sourdough bread- this time using the recipe for San Francisco sourdough bread. Actually since I added whole wheat flour, it is more of a pain au levain style bread. I replaced 2 1/2 cups of the white flour with whole wheat, added 3 T vital gluten and increased the water by 1/4 cup.

Since my sourdough failures, I was scared to use only the wild yeast. I followed the directions for the mixed method which used instant yeast combined with sourdough.

The result was wonderful. The flavor was complex, rich and deep. The bread raised beautifully. I didn't bake the bread quite long enough and the round loaf was not quite done in the middle. We enjoyed it anyway, but next time I'll know to bake the round loaf longer.

And there will be a next time, as this bread won big at our house!

Monday, March 1, 2010

Planning for Freezer Cooking Day

This week a friend and I plan to spend a day together cooking for the freezer. I expect it to be a lot of fun - even though I'm not sure how much we'll get done with six children under six! (Yipee! My teenage sister just offered to come help for the day. With three adults, our productivity will probably double! )

In planning for our cooking day, I've found some articles that were helpful.

Freezer Cooking Basics from Life as Mom

Once a Month Mom has shared a whole series of articles on making your own menu for freezer cooking. Scroll down to the bottom to see all the posts in the series. I've done some bulk cooking but never truly tried "once a month cooking". Her menus and ideas make me want to give it a try!

Money Saving Mom has some free printable worksheets to help plan your freezer cooking day.

Any advice from you all?

Doughnut Day!

I have written about no-fry healthier alternatives to doughnuts, but once a year the ladies of my family get together and make doughnuts. For one day there is no thought of calorie and fat content! This year we made over 300 doughnuts and they were so good! Thankfully they were split up between four families and there are a bunch of hard working farmers and carpenters who can handle the grease!

Rolling and cutting the dough.

Doughnuts rising.


Frying doughnuts.
Glazing doughnuts.

LinkWithin

Related Posts with Thumbnails