"Put Scripture where you can see it so your eye will remind your heart." - Jewish Proverb
Several years ago, I saw on a blog (that no longer exists) a lady who painted a psalm around the top of her living room wall. I loved the way it brought Scripture into every day life. I did something similar to our dining room (using stencils, since I have no artistic powers with a paint brush.)
This winter, I was bored with my "pale" kitchen (white cupboards, cream walls) and on a whim, I painted the walls a dark brown. There really wasn't much "wall" since our kitchen is mostly open to other rooms. But even that little bit of brown jolted the room.
(Don't worry. This blog isn't going to turn into a decorating blog. I don't have a bit of natural talent in the decorating arena. But I was so pleased with my kitchen, I just couldn't help but share!)
I found some large stencils at Hobby Lobby. The five inch letters were the perfect size to fill the odd shaped spot between my kitchen cupboards and the ceiling.
I chose a short verse for over the sink and another for the opposite corner. I love how my daughter will sometimes look up and read those words. Of course, it has only been a couple weeks since I finished stenciling, so the novelty will eventually wear off. I'd like to pretend that the Scripture was chosen as a reminder for my children but in reality it was the mom herself that needed the gratitude/joy reminder this summer.
Jenny shared a great post on decorating a home with Scripture. You can find some neat wall vinyls from P Graham Dunn that would be far easier then stenciling. They have lots of other Scripture themed products as well. But painting is cheaper and if you live near by - I'd be glad to share my stencils. I wish I was crafty enough to do free hand painting like Clorita!
I'm thinking that Scripture is going to be showing up in other places in our home.
Do you have any ideas to incorporate Scripture in your home decor?
Pages
▼
Tuesday, August 31, 2010
Saturday, August 28, 2010
Eat Your Veggies - In a Wrap
A great way to eat some more vegetables is in some sort of wrap.
We have enjoyed sauteing peppers, onions, and zucchini then scramble in some eggs. If the veggies are chopped the night before, it makes a quick breakfast. Spoon into a tortilla, sprinkle on some cheese or add some diced tomatoes or salsa and you have a breakfast burrito that can't be beat.
The same veggies can be added to beef or chicken fajitas.
I'm been experimenting with making my own tortillas. I have no idea how to get them round, as mine are lopsided ovals, hearts and anything but circular! But the flavor of homemade (like usual) beats commercial hands down. The most recent recipe I used was Amy's whole wheat tortillas and it was the best attempt yet.
It takes more time to make things from scratch, but sometimes I'm surprised when I actually watch the clock and find how little time it actually takes. For me, who does not live real close to a grocery store, sometimes it faster just to make something myself then pack up four children and go shopping! I generally avoid stores like the plague!
The other week, I had decided to make tortillas. I got a late start (I laid down with the children at quiet time and fell asleep myself!) and only had the ingredients measured in the bowl when a plumber showed up to fix a leak in our basement. By the time he finished, and I got back to the kitchen, I only had one hour before Ed would be home.
I quickly finished stirring the tortilla dough. The recipe said to allow it to rest ten minutes. While we were waiting, my daughter and I ran out to the garden to pick some onions, peppers, and carrots. We added these veggies with some zucchini from a friend. As soon as the tortilla's rest time was over we divided the dough in small balls. Then it needed to rest for another ten minutes, giving us time to cut our veggies up and get them frying in a pan with a little oil.
My daughter likes to help roll out the tortillas. She pats them with her hands then I finish with a rolling pin. It doesn't take long to fry them in a skillet and we soon had an assembly line going rolling and cooking tortillas. My children have difficulty holding and eating a fajita so I turned them into enchiladas. I spread the still warm tortillas with re-fried beans. I stirred some cooked chicken into the veggies and spooned it over the beans. Once rolled, the filled tortillas were placed in a baking pan. I spooned some tomato sauce over the top and sprinkled on some cheddar cheese. The whole pan was slid into the oven to bake for 20 minutes.
Whew! We made it! Now we had time to set the table and wake the younger still napping children. We didn't have time to take any pictures but the whole meal was made in less then an hour, including the oven time, and it was completely from scratch. Of course, it helped that my re-fried beans and chicken were already cooked. I always cook up a large batch and freeze the extras. I'm convinced that with just a little bit of planning, cooking from scratch is possible even for busy moms.
But there are two things to keep in mind when attempting to cook from scratch. First, it will always take longer when you are first learning. It takes me twice as long when I'm trying a new recipe then when I've made it numerous times. Second, you may choose NOT to make something yourself. Just because I can make tortillas, enjoy making tortillas, and believe my whole wheat tortillas taste better and are healthier - doesn't mean that I'm not going to pick up some tortillas at the store. I think I have some bought tortillas in the freezer right now and I'm sure they will be handy some night when I have something better to spend my time at then rolling tortillas.
I hesitate sometimes to share "from scratch" recipes because the last thing I want to do is heap a burden on an already busy mom. Some of us do this for fun (believe it or not)! Just because my hobby is cooking - doesn't mean you need to copy me, in fact, please don't! You will have different goals, dreams, and skills.
I really liked the post on When Homemaking gets in the way of Mothering. Good reminder that relationships need to be first! I have been guilty of thinking (if not saying) "go play something and let me alone so that I can cook you a wonderful meal." I want to be willing to (cough) buy bread if I can better meet the needs of my family. But I'm really hoping I can continue to do both!
I would love to hear how you keep relationships first in your home!
Friday, August 27, 2010
Tomato Sauce Tips
Making a thick rich tomato juice with homegrown tomatoes, is always my ideal goal. This tomato juice can then be canned or turned into ketchup or barbecue sauce.
Even on a dry year like we've experienced this summer, tomatoes contain a lot of water and there are several options to thicken watery tomato sauce.
This year I accidentally found a way to thicken tomato sauce that worked very well.
Since my tomatoes were ripening slowly, I washed, cored, and halved the tomatoes, placed then in containers and large bags and stored them in the freezer. When I acquired a nice amount of tomatoes (in other words, couldn't fit any more tomatoes in the freezer) I pulled then all out and thawed overnight. I was surprised the next morning to find that the tomatoes had all condensed together and a clear liquid surrounded them. I poured off this water, allowed them to sit for an hour, again poured off the liquid and proceeded with my recipe. The resulting sauce was the thickest and richest I have ever made!
I was telling my sister-in-law my discovery and she said that to make pizza sauce, she blends her tomatoes raw (skin on but not the cores) and lets the puree sit in the fridge overnight. In the morning, the water has separated to the bottom. She ladles out the thick tomato sauce on top and dumps the water.
Another benefit I found from freezing tomatoes is that they are already soft. I did not cook the tomatoes to make juice. I just put them through the food mill raw. It was so much easier then trying to ladle hot tomatoes.
And my last break through - use the food mill outside! I always had my kitchen splattered from floor to ceiling by the time I finished making tomato juice! I'm not sure why I never thought of doing it out on the deck on the picnic table! The clean up was so simple!
I'd love to hear your tomato tips!
Linked to Tuesday Garden Party
and Kitchen Tip Tuesday.
Even on a dry year like we've experienced this summer, tomatoes contain a lot of water and there are several options to thicken watery tomato sauce.
- Cook the tomatoes down with the lid off to evaporate the water.
- Add tomato paste to the sauce.
- Add cornstarch, clear gel, or therm flo to the sauce. (Cornstarch will sometimes separate when used in freezing and canning. Clear gel is better then cornstarch for canning. Therm flo is even better for canning or freezing - if you can find it. I purchase it at a bulk food store.)
This year I accidentally found a way to thicken tomato sauce that worked very well.
Since my tomatoes were ripening slowly, I washed, cored, and halved the tomatoes, placed then in containers and large bags and stored them in the freezer. When I acquired a nice amount of tomatoes (in other words, couldn't fit any more tomatoes in the freezer) I pulled then all out and thawed overnight. I was surprised the next morning to find that the tomatoes had all condensed together and a clear liquid surrounded them. I poured off this water, allowed them to sit for an hour, again poured off the liquid and proceeded with my recipe. The resulting sauce was the thickest and richest I have ever made!
I was telling my sister-in-law my discovery and she said that to make pizza sauce, she blends her tomatoes raw (skin on but not the cores) and lets the puree sit in the fridge overnight. In the morning, the water has separated to the bottom. She ladles out the thick tomato sauce on top and dumps the water.
Another benefit I found from freezing tomatoes is that they are already soft. I did not cook the tomatoes to make juice. I just put them through the food mill raw. It was so much easier then trying to ladle hot tomatoes.
And my last break through - use the food mill outside! I always had my kitchen splattered from floor to ceiling by the time I finished making tomato juice! I'm not sure why I never thought of doing it out on the deck on the picnic table! The clean up was so simple!
I'd love to hear your tomato tips!
Linked to Tuesday Garden Party
and Kitchen Tip Tuesday.
Tuesday, August 24, 2010
Preserve the Bounty
While summer may be busy, there is nothing that beats watching the shelves fill with food preserved for winter.
This week's Preserve the Bounty Challenge was preserving in vinegar. I wanted to try making some herbal vinegar this summer so this was the perfect chance. My herbs though, look a little wilted and tired from the hot summer. I should have done this project at the beginning of June when my herbs were lush.
I did have some dried tomatoes. Combining a few herbs with some dried tomatoes in a jar, I poured in some hot vinegar. How simple. Now they just need a chance to marinade and I'll use the vinegar to make some dressing for our salads this fall.
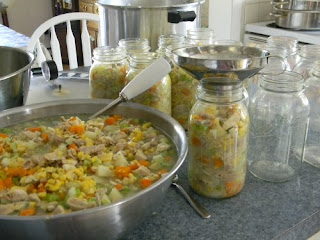
Another project last week was chicken corn soup.
This week I'm canning pears. Unlike peaches which all ripen at once, pears tend to ripen slowly so the job drags out for a week. But then it isn't an overwhelming task.
Monday, August 23, 2010
2010 Dutch Oven Cook Off
The third annual dutch oven cook off was once again a time of laughter, good natured competition and great food!
This year, eight guys brought their dutch ovens to our place, threw on some coals and made our mouths water.
Most of us are familiar with the dutch ovens that are used in our kitchen oven. The ovens these men were using are heavy cast iron pots with three legs and a rimmed lid. These are the pots that traveled with the pioneers and cowboys. With a little practice, any food baked in the oven can be prepared in the outdoors in a dutch oven.
This year, we enjoyed pizza,
stuffed chicken breasts,
crusty cheese bread, and more.
But the voted favorite was the Vaun's Chocolate Babka.
This bread tasted as good as it looked. Vaun made the dough totally from scratch following the recipe in Peter Reinhart's Artisan Breads Every Day. Impressive!
Can't wait for next year! You can also see pics from last year's dutch oven cook off.
I've been asked where you can purchase your own dutch oven. Many sporting goods stores sell them such as Cabelas and Gander Mountain. Look for an oven that is pretreated, has three iron legs and a rimmed lid for holding coals. If at all possible, purchase one at a store because the shipping can get rather expensive! Lodge is a good name, may be higher priced then some other brands, but Amazon gives free shipping. Beware of very cheap cast iron cookware as the iron may be pitted and rough and will be very hard to season well.
Friday, August 20, 2010
Eat Your Veggies - Zucchini Crust Pizza
I shared this recipe last summer. It continues to be one of my favorite ways to enjoy summer produce. If only our zucchini plant wouldn't have died, we would be having this every week!
My sis-in-law gave me this recipe several years ago. My children are not enthused about this recipe but Ed will ask the next day if there was any leftovers of the zucchini pizza for lunch - a true test that he really does like this recipe!
3 cup shredded zucchini
3 eggs, beaten
1/3 cup flour
1/2 tsp salt
Mix together well.
Spread on 12 inch greased pizza pan. Bake at 350 degrees for 8 minutes.
Add toppings.
2 cup shredded mozzarella cheese
2 small diced tomatoes
1/2 cup julienne green peppers
1/2 onion (sliced and rings separated)
1 tsp oregano
1/2 tsp basil
3 T Parmesan cheese
Bake at 350 degrees for 15 to 20 minutes.
You may also use the zucchini crust for any other pizza toppings.
Linked at Tuesday Garden Party
Tuesday, August 17, 2010
Homemade Baking Mix
Bisquick is a handy pantry staple, but I prefer to make things myself to have greater control of ingredients.
I've made several baking mix recipes. Most call for ingredients that I try to avoid like shortening. Dry milk is handy when we are camping, but I'd prefer to use the real thing at home. My goal was to find a baking mix using butter, milk, and whole wheat flour. This recipe was the result.
Homemade Baking Mix
5 cup whole wheat flour
1/4 cup baking powder
2 T sugar
1 tsp salt
1 cup butter
Mix the dry ingredients. Cut in the butter until tiny crumbs.
To use: mix one cup of mix with 1/3 cup of milk.
This is perfect for adding on top of a stew for dumplings. I haven't tried making pancakes with the baking mix since I have other recipes that I love.
It is also fun to add some herbs or cheese to personalize the biscuits.
I use freshly ground flour and I found out the hard way, that this flour contains no preservatives and needs to be stored in the freezer or fridge to stay fresh.
The recipe can easily be doubled or triples. A quick batch of this baking mix can make future speedy biscuits.
I'd love to hear about your homemade convenience mixes.
Monday, August 16, 2010
Eat Your Veggies - Dutch Oven Dumplings
I'm not a gourmet cook. I get a little nervous around people like my brother-in-laws who shop for ingredients I've never heard of! At our house, we are fanatical about good food but it is mostly simple country-style comfort food.
This recipe is favorite. Easy, fast, and SO yummy! I love that it is cooked in one pot. By changing different vegetables, meat, and seasonings, it will be different every time! A great way to use up odds and ends of different veggies from the garden.
4 cups broth
3-4 cups vegetables (green beans, peas, carrots, or corn)
In large pot or dutch oven, bring broth to boil. Add vegetables and cook for five minutes.
2 cups cooked diced chicken (or other cooked meat)
1 can cream chicken soup (of course, I use my homemade cream soup)
Stir in meat and soup. Add any other salt or seasonings as desired. I like a little thyme, poultry seasoning, and rosemary. Bring back to boil.
3 cups baking mix (like Bisquik)
1 cup milk
Mix baking mix, milk, and any additional herbs desired. Drop dough by spoon fulls into slowly boiling pot. Reduce heat to medium low, cook uncovered for 10 minutes. Cover and cook 10 minutes longer. Serve.
A baking mix makes this meal super quick. I'll share my homemade baking mix recipe tomorrow. But if you want to mix up some dumplings just for this dish, use this recipe.
Dumplings:
2 cup flour
1 tsp salt
3 tsp baking powder
1 egg
2/3 cup milk
Mix all dry ingredients. Stir in milk. Drop into boiling pot and proceed as above.
Saturday, August 14, 2010
This week in the kitchen
Another busy week putting up the harvest.
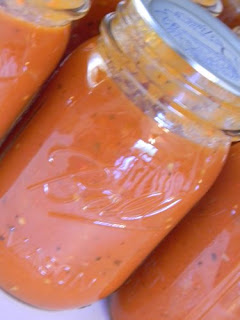
My sister helped me one day this week and we made over 40 pint of pizza sauce. Salsa and pizza sauce are my favorite things to can. They make the house smell so wonderful when they are cooking.
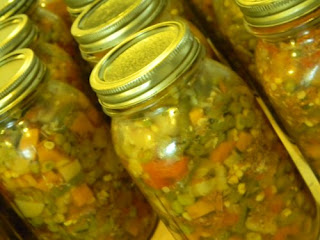
I also canned vegetable soup. It is a lot of chopping but it is so worthwhile to have canned soup on hand in the winter for an instant meal.
This week's Preserve the Bounty Challenge was oil preserving. Basically you just pour oil over your vegetables and it is supposed to keep for months! I was nervous about trying it. But decided to give it an attempt.
I have lots of garlic from our garden, so I minced up about a half pint of garlic (that is a LOT of garlic bulbs), stirred in a few fresh herbs, added a couple Tablespoons of apple cider vinegar to keep the bad bacteria at bay, and covered it with olive oil. Now the garlic is to marinade for a month at room temperature, then it should be ready to use.
Last week's sauerkraut experiment ended in a disaster. I didn't take any photos and I promise that you don't want to hear the details. I know a few things that I did wrong, and I think I'll try again. But it will be a while.
What is cooking in your kitchen?
Friday, August 13, 2010
Homemade Salsa Tutorial
Do you have tomatoes in your garden or from the farmer's market?
Today I'm guest posting over at Saving Naturally sharing a homemade salsa tutorial.
Head over and check it out. While you are there, find out how Stephanie saves money while still eating whole foods.
Today I'm guest posting over at Saving Naturally sharing a homemade salsa tutorial.
Head over and check it out. While you are there, find out how Stephanie saves money while still eating whole foods.
Showers of Blessing
I know you have heard a lot of whining from me about the drought this summer.
Yesterday I woke to the beautiful sound of water running through the rain gutter! There couldn't possibly be a more lovely symphony! I could almost imagine the crunchy grass giving a sigh of relief at the refreshing rain.
Best of all, this wasn't just the 1/4 inch shower that dries up an hour later. By this morning we had almost 2 1/2 inches of rain in the gauge! Thank you, Lord!
I sure won't ever ask to repeat a hot dry summer like this one, but maybe we need a year like this occasionally to not take little things, like rain drops, for granted. I planned to hang my laundry out today, but you won't hear a murmur of complaint if I have to run my dryer (for the first time in months.)
Wednesday, August 11, 2010
Praise the Lord!
I've been so blessed to have so many of you joining to pray for Baby G. Today I received this email from Karen.
My children have been faithfully praying for their little friend. They have been reminding me if I pray at a meal and forget! I can't wait to share this with them! Let's join in giving God praise - and continue to keep Steve and Karen and their family in prayer!
Yippee!!! An email of almost all good news - lots of prayers answered!
G needed NO dialysis Sunday or Monday and on Tuesday they removed the dialysis catheter and put in an NJ feeding tube (goes through the nose and bypasses the stomach, going right to the intestines).
Her blood counts stayed level two days in a row (after her fourth transfusion), so no transfusion today; tomorrow is to be decided after they see the numbers from today.
The ultrasound of her gall bladder, liver, pancreas were normal.
Her lipase numbers (the elevated number showing the pancreatitis) had been off the charts (4000 --- normal is somewhere in the 200s) for several days. They have dropped to 900 by this morning. Since they've dropped so much, they are going to start her on clear liquids by mouth sometime today and see how she handles it.
They've stopped the IV nutrients and are up to 20 ml of breastmilk (about 4 tsp.) an hour with through the NJ tube.
Isn't that great??!? All of a sudden I'm starting to feel much better myself! :)
Thank you all for praying; now you can all praise God with us for these answers to prayer.
There are still some concerns that we're praying about - G's potassium is still low and her blood pressure is still high. She is being medicated for the high blood pressure and they say she might still need to take that even when she comes home. - But let's pray about that, okay?
No one has mentioned a time to come home yet - in fact, two nights ago, they moved us to a private room because G was having trouble resting because of all the noise. (That itself was a direct answer to prayer. I noticed that G was bothered by the background noises of children crying, people visiting, TVs on, etc. but didn't think there was anything to do about it. It was a nice surprise when the nurse told me they were going to move us.)
By times, G has been sitting up, playing, reading books. I took her for a wagon ride yesterday (you should have seen that - imagine a tired mommy pulling a wagon AND the IV tree. Yeah, people were moving out of the way. I was scaring myself!)
So that's how we've been. Again, thank you so much for praying for G and for us. And thank the Lord for the improvements we're seeing!
Karen
My children have been faithfully praying for their little friend. They have been reminding me if I pray at a meal and forget! I can't wait to share this with them! Let's join in giving God praise - and continue to keep Steve and Karen and their family in prayer!
Tuesday, August 10, 2010
Eat Your Veggies - Great Green Vegetable Pasta
I wouldn't describe my children as picky eaters. They enjoy peas, beans, and broccoli. But if they spot zucchini, onions, peppers, or carrots on their plate - I will probably hear some whining. The one and three year old are actually better at eating their vegetables then the six and almost five year old.
Often, I dice up the veggies tiny so that they can't as easily spot the peppers or onions. But they need to learn to like vegetables sometime and I think most of it was in their heads and not a true dislike. As an experiment, for one week, I focused on vegetable heavy dishes. I kept the vegetable pieces large enough to identify, and didn't hide the contents of the dish. I did try to season it to their liking and supplied ketchup which makes anything go down better!
I'm not saying my children now love zucchini and peppers - but by Thursday, I actually received a compliment on the meal, from the pickiest child!
This was the favorite meal - see if it wins over your reluctant veggie eater! I love that it is prepared in just one pot!
Great Green Vegetable Pasta
This recipe is from Simply in Season - with a few of my own adaptions.
Sauce:
1/2-1 cup milk
1/3 cup Parmesan cheese
1/2-1 cup cottage cheese or sourcream, or 4 oz cream cheese, or 1/2 cup plain yogurt (obviously, I use what I have on hand)
1 clove garlic, minced
2 T fresh basil (or 2 tsp dried)
2 T fresh parsley (or 2 tsp dried)
1 tsp salt
Stir together and set aside. For smooth texture, you can puree cottage cheese in blender.
12 oz linguini or spaghetti
Boil a large pot of water and begin cooking pasta.
6 cups of green vegetables - use a variety such as broccoli, zucchini, green beans, asparagus, and peas.
When pasta is half way done, stir in your hardest vegetable such as broccoli. Boil a few minutes, then add green beans. Add zucchini, asparagus, or peas in the last couple minutes. As soon as all veggies are tender and pasta is cooked, remove from heat and drain well. Return to pot.
1 T butter
Toss butter with vegetables and pasta. Stir in prepared milk mixture. Toss gently and serve.
To turn this into a full meal (if your family, like mine thinks meat a necessity) stir in some cooked chicken. Leftover grilled chicken is extra delicious!
Book Review and Giveaway - Marital Bliss
When I heard Michelle and Christy wrote a book for new brides, I knew immediately that it would be worth reading. I've enjoyed these two sister's deliberate and transparent God-focused writing on their blogs. Last year, Michelle wrote My Brother's Keeper, a book sharing the story of a young handicapped boy that attends our church and it continues to be a favorite story of our children.
But Marital Bliss was written for brides experiencing the joys and adjustments of new marriage. I just passed my eighth anniversary and am not really a newlywed.
How well I remember the first months of marriage. I expected some changes. I remember asking why a woman was expected to plan the biggest social event of her life, take an extended trip, prepare a house for habitation, move into that house, take on a new name, adjust to a different schedule, be wholly responsible for all the cooking and housekeeping - all while learning to be a wife and lover! Just thinking about it scared me spit-less!
Surprisingly, the transition from being single to a married couple was rather smooth. Ed and I talked often of how we fit seamlessly together from that first "I do".
Was it because of the long agonizing hours of conversation? Even before our engagement, we had discussed and worked through a myriad of differences. Was it because of the awesome role models of both sets of parents who had showed us, in real life, a marriage built on strong leaders and supportive submissive wives? There were some adjustments, like menu planning and learning the Mennonite life. But mostly, we were so grateful for the ease in beginning marriage.
But that isn't all I remember about that first year. About six months after our wedding day, our eagerly anticipated pregnancy ended abruptly in a miscarriage and the bottom fell out of my perfect world. To say that I didn't deal with grief well, is an understatement. Ed always said he was first attracted to me because of my bubbling joy, but now I was a tear sodden puddle. I cried. all. the. time. Tears flowed when seeing a tiny baby at Walmart, when yet another friend called to say she was pregnant, when one more month went by and I wasn't. I could keep a cheerful face in public but Ed knew all the nights he held me tight while I cried. I hated who I had become. I wondered if I'd ever be a joy filled wife again.
By our first anniversary, I could look back on a fun, almost giddy year of making a home with the love of my life. There were trips, backyard camp-outs, private jokes, and silly memories I'll never forget. Marriage had been better then I ever dreamed. That first year, I learned so much about myself and my husband, about God and His sovereignty, about grief and life. I saw how God can heal a broken heart. I wouldn't want to relive the year, neither would I be the same person without the experiences of that first year of marriage.
Okay...so is this a book review or a trip down memory lane?
If my first year was so full of changes, growth, tears, and laughter - maybe Marital Bliss would have been a valued asset through those days!
Even though hardly a bride, I jumped at the chance to give away one of the books - which meant, of course, I had to read it to give a review! By the second chapter (on the topic of fear) I was pulled into the book. By page nine, I had grabbed my notebook to jot down a quote. By the chapter on communication at the end of the book, I was remembering some failures just the day before, and my toes had been stamped on hard. I finished the last page and had to fight the urge to wake up my sleeping husband, in the midst of his well-deserved Sunday nap, just to say how much I loved him and was glad to be his!
Marital Bliss is written from a Mennonite perspective. I love that being a homemaker and supportive help meet to your husband is assumed. There is practical suggestions for cooking, canning, grocery shopping, and hospitality. But best of all, the book clearly describes a marriage built on Jesus Christ. Whether the topic considered is loneliness, self acceptance, or the three lettered taboo word - Scripture is searched for application on the nitty-gritty details of life.
Adding to the experience of Michelle and Christy is the survey responses of many other brides. There is also a couple chapters written by more experienced wives on topics such as submission. You can't read this book without feeling a wave of relief that the changes and struggles you face are normal, that you are not the only one who loves your husband passionately yet feel confused about your role in your new life. This would be a great book to encourage a young bride in your life - but don't be surprised if you are tempted to read it first - and find yourself challenged - whatever your age!
I'm excited to share a copy of Marital Bliss with one of you. If you want to join the giveaway, just leave a comment. Since I love to hear wives brag up their man, share a quality about your husband that you appreciate. If you are not married, just share what quality you would value in a husband. You can also visit the new bride guide and learn more about their book and the authors.
Thanks to Michelle and Christy for sharing a copy of their book for this giveaway. Giveaway open until August 18.
Monday, August 9, 2010
Eat Your Veggies - Roasted Vegetables
I know I've done a lot of complaining about the drought this summer. It has been hard to watch the vegetation shrivel up. Last week, the farmers around us began chopping the corn. There is no hope of ears forming now and they might as well get a little silage out of it before the leaves turn to dust.
Though our garden is a dim shadow of last year's abundance and we have not had as much harvest to put up, we have still enjoyed lots of good eating. If our only vegetables were what we ate fresh from the garden, we still would have had much to be thankful for.
I've been searching for new ways to enjoy our veggies. My goal is to stuff as many and as varied of vegetables in our diet as possible. For us, it is easy to fill up on the meat and potato/pasta/rice/bread portion of the meal with only a little vegetables on the side.
Last week, a friend blessed me with two bags of zucchini. Every night I tried a new recipe, or variation of a favorite recipe and we found some new favorites. Many of the recipes were inspired by Simply in Season. If you are looking for creative recipes containing vegetables, you can't fail with this cook book.
One way I've increased our vegetable consumption is with variety. Green beans soon become wearisome, but a medley of vegetables encourage me to eat twice as many vegetables.
Even meals like pizza are not exempt. I'm been stir-frying onion, garlic, peppers, and zucchini and heaping the pizza high! I love when the crust becomes only a thin retainer for the veggies! Ed enjoys it too, but the children are less then excited. I often make a separate boring pizza for them, but hopefully they will come around.
Roasted Vegetables
This is hardly a recipe and the variations are endless.
Start with a large bowl (about 10 cups) of fresh vegetables. You could use squash, onions, potatoes, beans, peppers, carrots, mushroom, etc. Cut them in small pieces. Thinly slice vegetables that take the longest to cook like potatoes and carrots.
Toss the vegetables in a T of olive oil and seasoning to your taste. Try a little salt, chili powder, thyme and pepper. Or how about some fresh basil, oregano, and Parmesan cheese. Or you could omit the olive oil and just stir in 3/4 cup of Italian dressing.
Spread your seasoned vegetables on a baking sheet. Bake at 425 for about 20 minutes. I stir the vegetables about half way through the cooking time.
You could also tuck your veggies into tin foil and grill - or thread onto skewers and grill.
The flavor of these veggies are SO much better then boiled or steamed vegetables!
This week, I plan to share some of my favorite ways to enjoy vegetables. I'm hoping that it will encourage you to share your favorite methods and recipes. Write about them in the comments or, if you've blogged about vegetables, share your link.
Saturday, August 7, 2010
No lazy summer days here!
I know I haven't posted anything of substance recently. There is a lot of posts rattling around in my head but I haven't been sitting down at the keyboard much these days.
I think I may spend more hours in the kitchen in August then any other month. Here is a glimpse of what has been happening around my house and kitchen.
Our tomatoes are doing surprising well. I just love the smell salsa and tomato sauce.
But if the lid to the blender isn't quite on, I get a mess like this! It actually was far worse then it appears. I'm still finding tomato splatters!
Baking has been at a minimum but we were totally out of bread and granola -necessities at our house. I did a double batch of sourdough bread and three batches of granola. Hopefully that will get us at least part way through August.
The first week of the Preserve the Bounty Challenge was on fermentation. I really wanted to join in but my garden didn't contain anything good to use this preserving technique. I decided to buy some cabbage and make some sauerkraut.
I had made sauerkraut once maybe six or seven years ago. At the time, it seemed like a huge job, possible because I had something like eight large heads of cabbage which made a huge amount of sauerkraut! I canned the results and we only finished eating it last winter!
I was interested in reading some of the health benefits of fermented vegetables. I definitely shouldn't have canned the sauerkraut! Since you can make any amount, this time I only used one cabbage head, about 1 quart worth. I now have it sitting in the basement in a crock, hopefully doing it's thing. Watch for an update.
I started sewing for my brother's wedding. It isn't until October but I have five dresses to make, so I thought I should get started. I love to sew but it takes longer then it used to!
In my spare moments, I've been doing some organizing and cleaning to prepare for school. We haven't really quit during the summer, but I want to become more consistent in September. The back-to-school sales make a great time to stock up on supplies. The children are as excited at freshly sharpened pencils, clean notebooks, and new crayons as I remember being at their age. I so excited about all we will learn this coming year.
Friday, August 6, 2010
The Time Keeper
Ever feel like you have too many things on your mind? Often I think that if I could just clear my mind of all the things that are rattling around then I could actually get something done!
I've always loved the planner aisle of the office supply store. I dreamed of how the perfect product could turn me into an efficient and organized person.
Several years ago, my husband helped me design a simple planner that was perfect for my life as a homemaker. It gave me a place to jot down our appointments for the week, the important (or not so important) tasks I hoped to accomplish, and a menu plan.
Gradually that little book has become my brain. It lays open in my kitchen at all times and is filled with my scribbles, notes, and oddments that I don't want to forget. I can't imagine life without my planner. I'm still not an organized person (you don't want to see the desk in front of the computer screen right now) but a whole less falls through the cracks when I'm using my planner.
Last year I discovered The Time Keeper. Starla had designed a planner for homemakers that contained all the facets of my beloved homemade planner, but Starla turned it into a beautiful tool.
I have so enjoyed using Starla's Time Keeper this year. It is a delight to have a lovely planner designed by a busy mom just like me. I can't wait to see the new 2011 version! This year, Starla added some new features like perforated grocery lists.
I know it seems ridiculous to talk about 2011 when it is only August. But I also know that my fall will flit by quickly. I plan to order my planner soon so that I can begin to plan for the new year!
Just so you know, I'm not payed to endorse The Time Keeper. I'm just a very satisfied customer. Starla and I have emailed often enough that she feels like a personal friend - plus she reads my blog! I think her planner could benefit many other ladies as it has me! You can see more photos and order directly from The Time Keeper website. If you live in my area and want to combine your order with mine to save shipping, let me know in the next two weeks.
What tools do you use to organize your home and life?
Thursday, August 5, 2010
Please pray...
I've always known you all were a great group of readers but your response to Eunice's request demonstrated how caring you all are.
I'm going to pass on a prayer request. My friend Karen has a seriously ill 11-month old girl. Baby "G" got E coli. which moved into a kidney disorder. Below is the latest email I received from Karen.
G is in pain. She now has a condition called pancreatitis, which is some sort of irritation of the pancreas. Because there is no medicine for this, the treatment is no food or water by mouth. The pancreatitis is also very, very painful. She literally screamed in pain for four hours last night - and that was after two doses of morphine, one dose of tylenol, and four doses of another strong painkiller. That gives you an idea of how painful this is.
Currently, treating her is a very complicated issue. The HUS (causing the kidneys to not function properly) requires her to not have fluids. The pancreatitis requires her to not have food, thereby requiring fluids for her nutrition. The lasicks (spelling??) is the drug of choice for supporting the kidneys, but irritates the pancreatitis. Most pain medication would be filtered by the kidneys, but hers aren't working properly, so that limits the pain medicine choices. So you see the rock and the hard place.
Please pray that the Lord would relieve her of this pain. It is so hard, so very hard to watch her be in such pain. The nurses and doctors are doing what they can, but as a mom, it is so hard to believe that they're doing all they can. And yet, I'm sure they are - after all, it's their job and they're certainly well-educated. So, pray for us too.Stephen relieved me and stayed last night with G at the hospital so that I could come home and be with O, H, and C. (the first I've seen them in 5 days!) So, pray also that we can continue to meet all our daughters' need for parents while giving G our attention and energy.Thank you!Karen
You can visit Karen's blog to see pics of her adorable girls. And please, if you believe in prayer, hold this family up to the Lord. Then comment on her blog so she can be encouraged, too.
Thank you!
I'm adding this update on Saturday - Baby G's kidney has failed and is now on dialysis. She continues to be in a lot of pain. Please keep praying. Thanks.
Wednesday, August 4, 2010
Raising a Monarch Butterfly
This isn't the first time I've talked about raising monarch caterpillars. But it is one of our family's favorite summer activities and I thought it was worth reposting! I would probably have forgotten it if my children wouldn't have reminded me!
One of my favorite late summer memories as a child is finding monarch caterpillars and raising them to butterflies. Here in the northeast, monarch butterflies are laying their eggs on milk weed plants in July or August.
For a fun project for children (and adults!) take a walk down a weedy road or abandoned lot and look for tiny striped caterpillars on milk weed plants. Though you can raise other kinds of caterpillars, monarchs are easy to find because they only eat milkweeds.
Cut the milk weed plant and place it in a jar of water. The caterpillar will eat voraciously and grow quickly. You may need to pick more milk weed leaves for him to eat.
When he reaches his ultimate size, he will look for a quiet place to make his chrysalis. At this point it is good to have him trapped in a jar because he will roam out of sight in search of a quiet place! An ideal system is a large gallon size jar with a small baby food jar of water inside for the milk weed. But if you don't have a jar big enough, a box with a screen top so you can watch him, works as well.
The caterpillar will hang from his tail with a little webbing and then change into his lovely green chrysalis. I didn't think to get a picture of this step in the process! The chrysalis will gradually turn black and you'll be able to faintly see his wings.
In about two weeks, he will emerge as a beautiful monarch! Release him to the outdoors to begin his long flight to Mexico for the winter. Learn more about these fascinating monarch butterflies. We've been enjoying some of the library books about butterflies but nothing beats watching it first hand.
Give it a try, and maybe it will become a favorite memory for your children as well. (And you don't have to have a child around to enjoy it!)
Have you ever tried raising a butterfly?