Pages

Monday, June 29, 2009

Dutch Oven Cook Off!

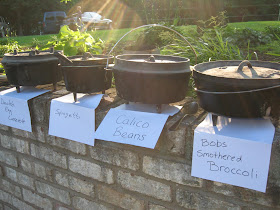
On Saturday we hosted the second annual DOG (dutch oven gathering) at our place. Even more men participated this year then last and the food was incredible!

There are various dutch ovens used in kitchens but these dutch ovens are cast iron pots which stand on three legs. The lid is rimmed to hold hot coals. It is this kind of pot that the pioneers and cowboys used to prepared baked goods when they had no oven. Basically anything that can be baked in a home oven can be prepared in a dutch oven.

We were introduced to dutch oven cooking by these folks about five years ago! Ed bought his first dutch oven soon after. Since then he has introduced dutch oven cooking to my brothers and several friends.

Ed has been wanting to attend an organized dutch oven cook off but they seem to be held only in the south west. Last year Ed invited everyone he knows, who owns a dutch oven, to a DOG at our house. The evening was a success and we looked forward all year to doing it again!

This year eleven men participated. There was 19 different foods prepared. We had a great variety of breads, main course dishes and desserts!

All the chefs and their families voted on their favorite dishes to find the grand prize winner! I found voting almost impossible as everything was SO GOOD! The real winners were all of us eaters and taste testers!!!
Ed and Cliff
Cliff's Braided Hawaiian bread won the grand prize!

His bread was as good tasting as it looked! You can find the recipe here!

We even had some hand churned ice cream!


Ed chose some of his favorite foods to make. He has three dutch ovens and made Russian Black Bread, Deviled Egg Casserole, and Apple Bars.

Here is the recipe to Russian Black Bread. I was out of rye flour so substituted whole wheat flour. It changed the flavor, obviously, but was still good.

Deviled Egg Casserole

This recipe is one of Ed's family favorites. When I first heard of it, I thought it sounded too strange to be good! Hot deviled eggs mixed in a casserole...didn't appeal to me! But, just for my hubby, I made it and now I love it too! Some wives make shrimp for a special meal for their husband. All I need to do is make deviled egg casserole! At the dutch oven cook off, numerous people mentioned how good it tasted, despite their reservations in even trying it!

Just in case you want to try it, here is the recipe. You don't need a dutch oven!

6 hard cooked eggs
1/4 cup mayonnaise
1 tsp salt
dash of pepper

Prepare deviled eggs and arrange in a baking dish.

1/4 cup butter
1/4 cup flour
2 cups milk

Melt butter, blend in flour, and stir in milk. Cook and stir until thick.

1 cup shredded cheese
1 cup diced cooked ham
1 cup peas

Stir in cheese, ham, and peas. Pour over eggs. Sprinkle bread crumbs over top. Bake at 375 degrees for 15 minutes.

Enjoy!!!
Apple Bars

3 cup flour
3 cup brown sugar
3/4 cup softened butter
1/2 cup chopped pecan or walnut (optional)
1 1/2 tsp cinnamon
1 1/2 tsp baking soda
3/4 tsp salt
1 1/2 cup sour cream
1 1/2 tsp vanilla
2 eggs
3 cup chopped apples

Comvine flour, sugar, and butter. Mix until crumbly. Stir in nuts. Grease 14 inch dutch oven. Press 3 1/2 cup crumbs on bottom. Add everything else to remaining mixture. Mix well. Stir in apples. Spoon into dutch oven. Bake at 350 degrees for 35 minutes. Serve warm with whipped cream.

What a fun evening! Now we have to wait for a whole year for the next DOG!

Saturday, June 27, 2009

What to do on a Rainy Day!

We are beginning to feel like we live in the tropics with several inches of rain a week! As a dairy farmer's daughter, with vivid memory of many dry summers, I don't have the heart to complain about rain. But if you have young children, you know that rainy days cooped indoors can be a challenge, especially when your youngsters are accustomed to spending their days outdoors!

Here is a few ways I've kept my children occupied! As usual, I've found that it often is not the fancy expensive toys that keep their attention the best!

Magazines - A few old catalogs, magazines, glue, and scissors, along with a little childhood creativity can be loads of fun. The floor may be covered with paper scraps afterward, but nothing a vacuum cleaner can't tackle.

Pony Beads - For children beyond the age of putting things in their mouth, pony beads are fun. I bought a large bag of multi-colored beads at Walmart. With pipe cleaners, string, and a few cups for sorting, there is endless projects. Try stringing a few beads on a pipe cleaner and see if they can make the same color pattern on their pipe cleaner.

Pasta - Similar to the pony beads, I mixed several kinds of dried pasta together (rotini, shells, macaroni, ziti) With muffin tins, spoons, and measuring cups, they pretend they are cooking, or sort the pasta in different bowls.

Play Dough - We all know this one. But sometimes I need a reminder!

Paper - I'm glad computer printer paper is cheap because we go through tons of it! Look on the web for ways to make little booklets. Add markers, crayons, paints, stickers, glue, sicssors, etc.
Paints - Speaking of paints - my in-laws gave our children the "Do-A-Dot" Paints. They are wonderful! I would never allow my children to paint with brushes and bowls of paint but these are almost mess free! The sturdy tubes have sponge tips. The paint is washable for whatever does miss the paper!

Okay, that is my ideas! What are yours? I'll start a list for the next rainy day!

Friday, June 26, 2009

Dairy Queen Ice Cream Recipe

What is summer without some homemade ice cream! We love this recipe and never make it without someone asking for the recipe!

2 envelopes of unflavored gelatin
1/2 cup cold water
4 cup whole milk
2 cup sugar ( I cut back the sugar to 1 1/2 and it was still great!)
2 tsp vanilla
1 tsp salt
3 cup whipping cream

Soak gelatin in cold water. Heat milk until hot but not boiling. Add gelatin, sugar, vanilla, and salt. Cool. Add cream. Chill in refrigerator for 5-6 hours. Freeze in ice cream maker. Makes one gallon.

Thursday, June 25, 2009

Homemaking Resources

Looking for an activities for your daughter this summer? Laurie at Future Christian Homemakers is giving free downloads of her Future Christian Homemaker's handbook. It includes detailed instructions on teaching girls homemaking skills, mostly cooking, but a few thoughts on cleaning and sewing as well. I know of one mom who is organizing her menus this summer around the skills and recipes she wants her daughter to learn. It was written for use with girls ages 8-15 but could be adapted for younger girls. You may be able to learn something yourself! Do you know the difference between baking powder and baking soda? Me, neither! And you could certainly use it with sons as well! I'm certainly glad that my husband is able to find his way around the kitchen! You can read the handbook online or print off the pages. Did I mention it was free?!

Do any of you have suggestions on a good children's cookbook? I remember loving the one the one we had when I was a girl and would like to get one sometime for my daughter.

If you are looking for a homemaking course for yourself, try reading Home Comforts by Cheryl Mendelson. I recently received this book through Paperback Swap and am thoroughly enjoying it! This huge book (over 800 pages! No, I've not finished reading it!) is not a book on decorating or organization but on "the art and science of keeping house." Obviously she doesn't leave a stone unturned in the subject and more amazingly, she has succeeded in making the subject interesting! I appreciate her goal of instilling meaning into housekeeping. Her desire is not just to tell the what and hows of doing housework or to describe how to get the drudgery of housework done faster but to give training so that we can enjoy making a comfortable home.

Here is a few quotes from the introduction.

"Our homes are the center of our lives, and we should allow time and resources to make the most of them that we can, and to care for them in a way that consolidates and elaborates their meaning for each of us. At a minimum, we should avoid thinking that time spent on our homes is wasted time, or that our goal should always be to reduce the time and effort we spend on them."

"Because it is true that whoever loves the end also loves the means, all of us who really do enjoy living in a well-kept home can come to enjoy the rituals of its care. The act of taking care of our homes brings comfort and consolation both in the enjoyment of the fruits of our labor and in the increasingly rare freedom to engage in worthwhile, unalienated, honorable work."

Mrs. Mendelson is a New York City lawyer and does not write from a Christian perspective or from maybe even our rural outlook but she has written a book that I can recommend to any homemaker!

Wednesday, June 24, 2009

Our Movable Chicken Pen - Or Chicken Tractor

Several of you thought we were being naive to think our chickens would not damage our garden! Several weeks ago it became obvious that they were not going to stay in the pasture without encouragement! We've been using our movable chicken pen for several weeks now and we are quite pleased with the results of this easy project!
Ed took a piece of the plastic water tubing left from our strawberry netting project and made two large circles of equal sizes. These tubing circles were attached to the top and bottom of a piece of cage wire. He cut the wire about every foot and bent the wire over the tubing and secured with plastic ties. We now had a sturdy movable pen! Ed cut a door to meet up with the little chicken door of our coop and used a little bungee cord to secure it. A tarp was attached to the top to provide shade.
Each morning, Ed pulls the pen over to the coop and opens the chicken house door. The chickens are usually quite eager to have fun outdoors. Ed then drags the pen to a spot of fresh pasture grass and places their water jug inside the pen. Usually halfway through the day I move the pen a few feet to fresh grass. The pen is light enough for the children to move and the chickens have learned to hop along! In the evening, or whenever we want the chickens to return to their coop, we tilt the pen up and the chickens madly dash for the coop and their waiting grain!

Maybe this sounds like lots of hassle! Why not just let the chickens in the coop? We are finding that the chickens eat less grain when on the pasture. The grass where their pen was sitting is eaten short in those few hours and is well manured! The next day we sit the pen in the next plot of grass in hopes to evenly distribute the manure. So we are buying less grain, hauling less manure out of the coop and the chickens are not eating our garden! Occasionally we let the chickens run free for an evening when we are near by to watch the garden. Once our chickens begin laying eggs, hopefully in only a few weeks, we will let them in the coop all morning in hopes that they lay their eggs in the nesting boxes. There is numerous other chicken tractor designs including ones with nesting boxes. Our goal was something simple, temporary, and light weight. In the past couple weeks our pen has been tested in torrential rain and hail, and held up well!
Just a note: The photos in this post were taken on a day that only six of our twenty chickens were in the pen!

Baked Macaroni and Cheese

Everyone seems to have their favorite method of making mac n cheese. Here is our version. When this dish is on the table, our children will hardly eat anything else. I like this version because of all the eggs. I feel like the children are getting some protein even if this is all they eat! Sometimes I make it with whole wheat pasta, or even add some cooked broccoli or peas to further up the health value!

2 cups dry macaroni - cooked until still slightly firm, drain
3 T butter
4 eggs, beaten
1/2 cup milk
2 cup shredded Cheddar cheese
1 tsp salt
1/8 tsp pepper

Stir butter into macaroni. Beat eggs with milk. Mix all ingredients together. Pour into greased baking dish. Bake at 350 degrees for 20 minutes. If desired, sprinkle with more grated cheese and paprika and bake 5 more minutes until cheese melts.

Tuesday, June 23, 2009

Pudding Pops

I'm continuing to share some summertime favorites this week. At our house, anything frozen is a winner during hot weather. Pudding pops are a fun easy treat that we all like!
Just make a batch of pudding, spoon the pudding into small paper or plastic cups, place a Popsicle stick in each cup and freeze! To eat, set the cup in some warm water for a few seconds to make it easier to slip out of the cup. Enjoy!

Monday, June 22, 2009

The Best Ice Cream Cake

My family loves ice cream, and ice cream desserts are even better. I love this particular recipe because it makes two 9x13 pans! Perfect to have in the freezer for impromptu hospitality! (And if you come to my house and I serve this, you'll just have to pretend you've never eaten it before! The disadvantage of being so generous with my favorite recipes! But if I come to your house, you are welcome to serve this cake! We never could get tired of it! I think the recipe originally came from Barb!)

6 eggs, seperated
2 cup sugar, divided
2/3 cup water
1 tsp vanilla
1/2 cup cocoa
1 1/3 cup flour
1 box vanilla icecream
Oreo cookies, crushed
2 cup peanut butter
1/2 cup butter
1 cup milk
2 cup confectioner' sugar
1 tsp vanilla
Cool Whip

Beat 6 egg whites until foamy, then slowly add 1 cup sugar and beat until stiff. Set aside. Beat egg yolks three minutes. Add 1 cup sugar and beat two minutes. Add water, vanilla, cocoa, and flour. Beat well and then gently fold in beaten egg whites. Pour into two greased 9x13 inch pans. Bake at 350 degrees for 15-20 minutes. Cool. Cut ice cream into 1/2 inch slabs and place on top of cake. Spread a thin layer of Oreo cookie crumbs. In saucepan, melt peanut butter, butter, milk, confectioners' sugar and vanilla until almost boiling. Cool. Spread on cakes. Top with Cool Whip. Freeze. Enjoy!

Linked to the Ultimate Recipe Swap

Garlic Scapes


Do you know what these are? They are garlic scapes. I am growing garlic for the first time. I planted the bulbs last fall, and they've been doing well this year.

I really don't know much about garlic growing but I do know that hard neck garlic forms a "scape" or curled seed pod that needs to be removed. I know that the scapes are edible but I'm not sure what to do with them. I added them to a chicken asparagus stir fry the other night and they were delicious. They tasted like mild garlic.
Here is my little garlic patch. There is four short rows, two of hard neck garlic, and two of soft neck garlic. I just put on some compost so the bed looks real good right now!

Garlic is super simple easy to grow. Just plant in the fall, and other then keep weeded, there is nothing to do until the late summer harvest! Now that is my kind of gardening! Last year I ordered my garlic bulbs online and found that many varieties were sold out in the fall. If you are interested in growing garlic, I would place your order now.

Any of you have any other ideas to use garlic scapes?

Saturday, June 20, 2009

Children's Garden Update

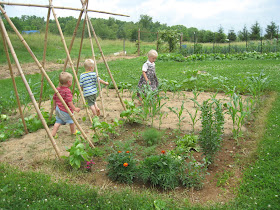
Our children's garden is growing!
The beans are starting to grow up the poles.
The corn and sunflowers are tall enough to see the effect of the maze!
The fact that we've gotten this far without the two year old destroying everything, is amazing! He loves to use his little hoe and shovel in the garden with no thought of what may be planted!
You may be able to see the effect of mulch. Where we layered cardboard and grass clippings, no weeds. Where there is bare dirt, despite weeding, we still have weeds! The grass bagger on our mower is one of my best friends!

Thursday, June 18, 2009

Meadow Tea Concentrate

My mom shared this recipe with me. If your mint is growing as furiously as mine, maybe you'd like to try this too! It sure makes a quick way to serve meadow tea when friends are coming over!

Ingredients:
2 qts. water
4 c. mint leaves, packed
3 c. sugar - or to your taste. I use 2 cups.

In large kettle, bring water & sugar to a boil. Boil 5 min. Turn off heat. Add the mint leaves & let stand until cold. Strain mint leaves. To use, mix 1 part concentrate to 3 parts water. I freeze the concentrate in quarts, which then makes 1 gallon.

Wednesday, June 17, 2009

Blueberry Streusel Muffins

I am still on a muffin baking binge! And no one is complaining at our house! I'm still experimenting with recipes using a master muffin mix. It is a quick way to make muffins and I'm almost ready to share it with you! Until then, here is one of our favorites!

1 cup white flour
1 cup whole wheat flour
1/3 cup sugar
2 tsp baking powder
1/2 tsp salt

Mix all dry ingredients together.

1 cup fresh or frozen blueberries

Stir gently into dry ingredients.

1/3 cup melted butter
1 egg
1 cup buttermilk

Mix together butter, egg and buttermilk. Stir into dry ingredients just until moistened. Spoon into greased muffin pan. (Makes 12.)

Struesal Topping:
3 T brown sugar
2 T flour
1 tsp cinnamon
1 T butter

Mix together topping ingredients. Sprinkle over muffin batter. Bake 375 degrees 18 minutes.

For more recipes using blueberries, see Tammy's Recipes!

Hot Pockets

This week I'm sharing some of our favorite summer recipes. I like to make up a big batch of these sandwiches and freeze them. They make a quick summer meal and we enjoy them hot or cold.

2 T yeast
1/2 cup warm water
3/4 cup warm milk
1/4 cup sugar
1/2 cup soft butter
1 egg
1 tsp salt
3-4 cups flour (I use half whole wheat.)

Filling ingredients:
Whatever you wish!
Options include ham and cheese or pizza ingredients

Dissolve yeast in warm water. Add milk, sugar, butter, egg, salt and two cups flour. Beat until smooth. Add more flour until you have a nice smooth dough. Knead for several minutes. Allow to rise until double. Divide dough into 16 pieces.
Roll out each piece of dough and layer sandwich ingredients in center. Do not over fill.
Fold edges over filling and pinch tightly to seal.
Place sealed edge on baking sheet. Brush with milk and sprinkle with sesame seeds if desired. Let rise for 20 minutes.
Bake at 400 degrees for 8-12 minutes.

Tuesday, June 16, 2009

From Paradise to Paradise - book review

From Paradise to Paradise by Darletta Martin

Knowing my love of local history, my husband told me about this book they were printing. (My husband is a printer.) When he told me that it was about one woman's life and the length of the book, I thought it would have to be very dry and boring. I was wrong! This book is a very interesting chronicle written about the life of Leah Martin who lived most of her life, all 101 years, a few miles from our home. Her great grand daughter compiled the book from various family members diaries. My husband, and maybe some of you, know many of the people described in the book. But even for someone like me, who does not know the characters involved, it was still a worthwhile read! I especially enjoyed the details of how the World Wars and Great Depression affected their lives. But mostly, I was encouraged by Leah's example as a wife and mother. Through sickness, everyday struggles, joys and many changes, her faithfulness to God and her family is worth emulating. For those days that I wonder what importance is found in my daily homemaking tasks, a book like this one is what I need to read!

Monday, June 15, 2009

Freshly Squeezed Lemonade - the easy way!

I wrote about an easy method of making freshly squeezed lemonade before. But, if you are like me, nothing beats real photographs for understanding! So I'm reprinting the recipe with pictures this time!

4 lemons
2 cups sugar
1 gallon water
Cut two of the lemons into eighths.
Place in the blender. Cover with water.
Blend quickly but don't puree. There should still be small chunks of lemon remaining.
Set a gallon pitcher in the sink with your colander over it. Pour the lemon mixture into the colander.
Run water through the lemons and squeeze well. Do the same with the remaining two lemons.
Keep running water through the lemons until you have one gallon.
Add sugar. Stir well, cool and serve!
You can also not add as much water, freeze until needed, then thaw and add the remaining water. My mom made many gallons of this lemonade for our July wedding!
Somehow, I think lemonade tastes better when poured and served in glass! Don't you? This jug is a old milk jug from my grandparent's dairy.


If you want strawberry lemonade, just blend a few strawberries and add to the lemonade. Fabulous.

Sunday, June 14, 2009

Planting Buckwheat for Cover Crop

In the past, I mentioned that we plant buckwheat when we finish harvesting part of our garden. I've had several questions since then so I thought I'd give some more details. Maybe you are finishing your peas and have some empty places in your garden.

We purchased a large bag of buckwheat seed from a farm seed dealer. If you don't live in an agriculture area like us, you can purchase buckwheat seed from numerous seed companies.

When an area of our garden is finished harvesting and we don't wish to plant a successive crop, we till the ground and broadcast the buckwheat seed. The seed does not need covered. It sprouts quickly before the weed seeds have a chance to come up.

In about a month, the buckwheat is full size and blossoming. At this point, we rototill the buckwheat into the ground, before it has a chance to go to seed. We usually immediately plant more buckwheat seed. Don't wait for it to go to seed and drop seeds all over the place, unless you wish to have buckwheat growing on that plot of land for some time! Buckwheat stems are hollow and easy to till in. If you don't think your tiller can make it through, you could always mow it off first, then rototill, but we've never had a problem.

The idea is to add the green matter into the soil where it will decompose and add nutriments to the ground. It is sort of a lazy man's way of making compost. Dick Raymond in "The Joy of Gardening" calls it "green manure". In his test gardens, he added no fertilizers, compost, manure or additives of any kind for years but with regular use of green manure crops, his gardens were rich and increased production.

Last year, in the spot we wanted to plant blueberries, we made numerous plantings of buckwheat, tilling and replanting several times to build up the soil. I saw a big improvement in that areas soil this spring.

Besides buckwheat, peas and beans are two other good choices. Legumes such as peas and beans are especially good at adding nitrogen to the soil. I try to plant corn (a heavy nitrogen feeder) where beans or peas were planted the year before. If you have some old seed that you want to get rid of, broadcast it over the area, and rake lightly or rototill just the top inches. They won't be in neat rows but you could probably pick enough beans and peas to enjoy fresh then rototill the plants for the benefit of the soil.

To me, planting a green manure crop is well worth while just for the sake of keeping those end of summer weeds at bay! Though there are numerous options in cover crops. Buckwheat is a fabulous option because it grows quickly in the hot summer weather and very efficiently smothers weeds, while adding to your soil! The cost of a few seeds is certainly cheaper then most other fertilizer or mulch options - unless you have animals!!! I still have much to learn about gardening but this is something simple that has worked very well for the past several years.

Friday, June 12, 2009

Baby Smiles!

Love that grin and could not resist sharing!
Two months old and obviously thriving!

Thursday, June 11, 2009

Strawberry Muffins

1 cup flour
1 cup whole wheat flour
1/2 cup sugar
1 1/2 t baking soda
2 eggs
1 cup yogurt
1/4 cup melted butter
1 tsp vanilla
1 cup chopped strawberries, fresh or frozen

Mix together flour, sugar and baking soda. In another bowl, mix eggs, yogurt, butter, and vanilla. Toss strawberries in flour mixture. Pour yogurt mixture into flour and stir gently. Spoon into greased muffin pans. Bake 18 minutes at 375 degrees.

I've been working on developing various kinds of muffins from a master muffin mix recipe. We've been eating muffins quite frequently the past weeks as I've tried different recipes. This was a favorite and perfect since we have fresh berries. I have successfully made it using frozen berries as well.

I hope to be sharing the results of my muffin mix experiments soon. Meanwhile, do you have a favorite muffin recipe that I could try? I'd especially like to find a good streusal topping.

Wednesday, June 10, 2009

Sausage Kale Pizza


In the search for more family friendly kale recipes, I made the pizza that was a real hit!

I took a large bowl full of kale leaves, washed and spun it dry, trimmed off the tough middle stem, chopped the leaves finely and sauted them with onion in a little oil. Then I sprinkled it on my pizza with sausage, cheese, and, of course, sauce.

Very good! I'll need to add this to the list of pizza toppings!

Tuesday, June 9, 2009

Cornmeal Rolls


We seem to eat a lot more rolls in the summer. I like to have rolls in the freezer for an impromptu picnic. Though the sandwich buns recipe is the one I use most frequently, sometimes I am looking for variety and make cornmeal rolls. This recipe is one our family has enjoyed for years. The cornmeal adds a golden color and wonderful flavor. They are equally good as dinner rolls or cut large for sandwiches. My favorite use is with pork barbecue!

1/3 cup cornmeal
1/4 cup honey
2 tsp salt
1/2 cup butter
2 cup milk

Mix and cook on stove until thickened. Cool until lukewarm.

1/4 cup warm water
1 T. yeast

Dissolve yeast in water.

2 eggs
4 cups flour (or more, I use half whole wheat.)

Combine the cornmeal mixture and the yeast water with the eggs and mix well. Add flour until you have a soft dough. Knead for five or more minutes. Place in greased bowl, cover and let rise. Punch down. Roll out and form into rolls. I like to cut them with a biscuit cutter. Place on greased baking sheet, brush with melted butter and dust with cornmeal. Rise until double. Bake at 350 degrees for 15 minutes.

Monday, June 8, 2009

Cloth Diapers

I have been asked numerous questions about cloth diapers recently. I've been wanting to write out everything I know about cloth diapering for the benefit for those who are interested in this frugal option. But I've never taken the time to do it! This past week, Simple Mom did a whole week of articles on all things concerning cloth diapering. I sure could not have written anything better myself. So if you are interested, go to her site to learn all about it.

Following is an edited version of what I wrote last summer in my newsletter. I've added some more information answering some of the questions I've received.

I know that most of you are not in the baby stage of life, and even fewer of you would probably even consider cloth diapers, but I have to admit that I LOVE CLOTH DIAPERS! Yes, now you know for sure that I'm weird! But I just walked in from bringing an arm load of sun bleached diapers and I'll soon be wrapping my little one's bottom in soft cotton. What is there not to love! Sure there is a few more loads of laundry, but for me it has been far worth it. And several hundred extra bucks each year doesn't hurt anything either!

If you have done any research on cloth diapering, you've discovered that diapers have come a long way from the strips of flannel and huge safety pins your mother used. There is so many options in diapers out there (FuzziBunz, BumGenius, pocket diapers, etc) that it is positively overwhelming and some products are not cheap! I chose the simplest options of unbleached Chinese pre-folds, Dappi covers, and Snappi fasteners. I've been very pleased and even my husband learned to master the Snappis. (Just guessing, but I think diaper pins would have scared him out of the bathroom!)

If you are interested in cloth diapers please DON'T buy cloth diapers from Walmart or Target!!! You might as well wrap your baby in a paper towel then use Gerber. They just are not absorbent! Buy the durable diapers used by diaper services. Some of my diapers are now on their fourth child! They may be a little worn and tattered but they still work! I bought mine from F.A.M.I.L.I.E.S. (There website doesn't show their diaper products, so ask for a catalog. They are a family company with very fast service.)

Do they leak? Yes, sometimes, especially when I need to move up to a larger size diaper cover. But so do disposables! In fact, right now Brooke seems to be on a schedule that she holds in all in and does one gully washer of liquid poo each evening! If she is in a disposable, everything, including mom, needs changed! But a cloth diaper seems to have enough folds and weight to hold most of it in.

How do you store and clean cloth diapers? I keep a tightly sealed plastic bucket under the bathroom sink where I keep dirty diapers. When that is full, I empty them into a larger plastic bucket in the basement near the washing machine. I do not pre-soak the diapers. When I'm ready to launder, I dump the diapers into the washing machine with detergent and wash with hot water. I like Charlies Soap. Sometimes I do a double rinse, but usually I do not. I never dry the vinyl diaper covers in the dryer. I prefer to hang the diapers outdoors to take advantage of the sun's power to whiten the diapers, especially now with newborn yellow stains! It makes them pure white.

I am not a cloth diaper purist. I only use cloth diapers at home. Don't worry, if you ever babysit for me, I won't ask you to change a cloth diaper! Though my husband is so grateful that I learned to change cloth diapers growing up, he threatens to send our children to my parent's with cloth diapers so that my younger sisters can have the same advantage! But I know that my mom would just do all the diaper changing! I've also used a lot of disposables on my youngest son at night as he seems to have sensitive skin and, though he was fine during the day, it seemed to aggravate it at night in a cloth diapers, though I think he is growing out of it. With an infant, two year old, and three year old in nighttime diapers, I would be going through a huge stack disposables. For three weeks after Brooke was born I used disposables for convenience and couldn't believe how many packs we went through! The amount of trash we made those few weeks was astounding! It made me even more determined, and grateful, to use cloth.
And once again I'll add my disclaimer...I am not saying that you should use cloth diapers! There isn't anything more spiritual about cloth vs. disposables. I just mention it for anyone who might be interested in the option and need some courage to give it a try! You might surprise yourself and love it, too! I enjoy writing about the things that work for me, whether diapers, cooking from scratch or having chickens. But you and your husband may have entirely different goals for your home! Don't put yourself on a guilt trip because you choose another path! Wouldn't the world be horribly boring if we all did things exactly alike!